Printfriendly

Print Friendly and PDF
Showing posts with label chocolate. Show all posts

Tuesday, October 28, 2014

Chocolate Cake with Whipped cream - THM S

Hello everybody! Don't have much time to write a long post today but I've been thinking about sharing this delicious recipe with you for quite a bit now... I owe it to some dear friends who have been asking me for either sugar free or gluten free desserts... This one fits both categories! So ... YOU HAVE TO TRY IT! If you are following the Trim Healthy Mama Lifestyle then let me tell you that this dessert should be eaten on an "S" setting (S for Satisfying). Also, remember that we have a special promo code for "The Coffee Shop" readers to get 40% discount on some delicious Torch Coffee, get 1 bag or take advantage of the discount and get several bags, they will make an amazing Christmas gift! Just pick your favorite gourmet coffee and use promo code: love4coffee at checkout.

Disclaimer: I am not being compensated in any way for hosting this special promotion. I appreciate TORCH for doing this for my readers.

 And now... the cake:


Devil's Food Cake

Recipe for the cake slightly adapted from: askgeorgie.com

For the cake: (all ingredients should be at room temperature)
  • 1 cup almond flour
  • 1/4 cup coconut flour
  • 3/4 tsp baking powder (I use aluminum free)
  • 1/2 tsp baking soda
  • 1/4 tsp salt
  • 1/2 cup Xylitol (or you can use 1/4 cup of xylitol plus 2 tbsp. of THM Sweet blend*)
  • 1/3 cup unsweetened natural cocoa powder
  • 1/2 cup water
  • 2 eggs
  • 1 tsp vanilla extract
*Note: Erythritol and some sugar alcohols can cause discomfort for some people with a sensitive digestive system. Erythritol is an ingredient of THM Sweet blend, I prefer to use Xylitol (made from 100% Natural Birch).


For the whipped cream: (this ingredient should be COLD, really COLD) - if you're not a purist you can just use reddi-whip, I prefer to make my own whipped cream, it's really easy!

  •  1 cup of heavy whipping cream.
  •  1 doonk of pure stevia - add another if necessary to taste- ("doonk" is a THM term, a doonk is the equivaltent of a "pinch" or 1/32 tsp.) - you can also use truvia to taste-
  • 1 tsp. vanilla extract
Directions:

1st. of all place a big mixing bowl and the whisk attachment in the freezer to chill (to prepare the whipped cream)

1. Preheat oven to 350 degrees F. Butter or oil the inside of an 8×8″ or 9×9″ cake pan.

2. In a large mixing bowl, stir together almond flour, coconut flour, baking powder, baking soda, xylitol (or sweeteners of choice, if you use xylitol make sure you grind it so it incorporates better into the batter) and cocoa. Stir with a wire whisk to mix and until lumps disappear.
 
3. In a second bowl, stir together water, eggs and vanilla. Pour into bowl with dry ingredients and stir to mix. Spread in the pan and smooth with a spatula. Bake 15 minutes or until toothpick inserted in center comes out with just a few crumbs.

Cool over wire rack.

Right before serving make the whipped cream:

Place the heavy whipping cream in chilled mixing bowl, add the sweetener and mix on high for a couple of minutes (don't over mix) until it has the right consistency of whipped cream, add vanilla and mix on high for just a couple more seconds.

Serve over cooled squares of chocolate cake... BLISS!

 Enjoy ... with a cup of Torch Coffee of course.

second slice, why not?
   
© Paloma K.

Monday, January 20, 2014

Chocolate Chip Pound Cake with The Cake Slice Bakers

This month  our group  picked a simple, traditional and may I say delicious Pound Cake... I think, for me, this will be my "go to" recipe when it comes to Pound Cake. Not too dense/heavy, very delicious vanilla flavor with a beautiful crumb! We are currently baking from Great Cakes by Carole Walter and this book is loaded with recipes (although not that many pictures) and so far, the recipes from this book have worked for me. I do look forward to baking a bit more challenging cakes, I miss making puddings and frostings for our group... but I must say my "lazy side" has enjoyed the easy method of the cakes that have been picked.

You can make this pound cake in a snap! It is great to enjoy over coffee when having guests, it doesn't use any unusual ingredients and ... it's so easy to make that I actually made 2  of these within the same week. You can choose from three versions of this cake, a "nutty" one, a "spirited" one and a "chocolate chip"... which is the one I picked and ah! I am so happy I did... The chocolate chips are processed to make them smaller (in a food processor)... ehem... believe it or not... I don't own a food processor yet... so I used the blender... which gave me a bit of trouble because the recipe warns to not over-process the chips (or you'll end up with lots of powder instead of smaller chips) What I did to fix this was that I actually used a sifter to separate the bigger chips from the smaller ones. The chocolate chips, once they were processed added to this cake a delicious chocolaty creaminess in every bite and I loved that the chocolate chips didn't have the "perfect chip shape" but were rather rustic and made it look more "from scratch" I feel.

The cake batter reminded me of a Dairy Queen "Oreo Blizzard"


 So... fear not! The delicious "chocolate chips" that turned into dust were put into good use though... I used them to garnish each slice of cake! I made a classic vanilla whipped cream and dusted it with the semi-sweet "powdered" chocolate chips. It was the perfect complement for the cake.


Get this book and you'll get this and many more recipes that I am sure will give you lots of fun in the kitchen and a good time with family and friends.


© Paloma K.

Tuesday, August 13, 2013

How to make camouflage cupcakes FROM SCRATCH


Camo Cupcakes, that's what someone from church ordered last week for our "Choir Kick-off" in church... Don't ask me why it was camo cupcakes... let me just say it was fun! LOL!

So... if your hubby is a hunter or you want to make a special batch of cupcakes for Memorial Day/Veterans Day or if you want to make a birthday boy very happy these cupcakes are perfect for the occasion!

Now... It's just really simple, you just have to be a little patient... if you look anywhere else online you will see that everybody is using cake mixes for these... I guess they say "well, they're cute enough and there's enough work involved with the elaboration, why bother making them from scratch?", plus, there's a big reason why people use cake mixes for these, think about it, you want the batter to be "the same" so that it doesn't have any problem with different textures/rising levels, etc. BUT you can still make a delicious batter from scratch that is good for this purpose and it doesn't have to be too complicated.

What I used is my easiest "go to" chocolate cupcake ingredients:

Delicious and Fluffy Chocolate Cupcakes (Yield: 12 cupcakes)

  • 1 1/2 cups flour
  • 1 cup granulated sugar
  • 1 teaspoon baking soda
  • 1 teaspoon salt
  • 1/3 cup cocoa powder
  • 1/2 cup vegetable oil (preferably safflower)
  • 1 cup water
  • 1 teaspoon vanilla extract
  • 1 tablespoon vinegar
As you can see the recipe calls for cocoa powder and it yields 12 standard sized cupcakes. So I just recommend you to make 2 batches. 1 exactly like the recipe calls and an additional batch where you will omit the cocoa powder and just increase the amount of all purpose flour with an additional 1/3 of a cup and 2 tsp. of vanilla extract instead of only 1.

The ingredients above you just have to mix them all together, the order doesn't matter too much, but I do prefer to mix flour, salt and baking soda first (and cocoa for the chocolate batter) and then just incorporate sugar, oil, water, vinegar and vanilla.

Once you have both batters (chocolate and vanilla) you will divide each batter in half, so you will have two chocolate batters and two vanilla batters, having done this just add some black gel food coloring to 1 of the chocolate batters and some green gel food coloring to 1 of the vanilla batter (plus some extra tablespoons of chocolate batter just to create the dry hue of military green you need) and voila, you will have 4 different colors of two different batters, 1 black chocolate, 1 brown chocolate, 1 military green vanilla, 1 plain vanilla.

What you want to do at this point is preheat your oven at 350 F, line your muffin tin with baking cups (cupcake paper liners) and fill plastic bags (ziploc or piping bags will work) with each of the batters, pipe the batters into the cupcake liners starting with the plain vanilla (about 1 1/2 tbsp. or so) to cover the bottom of the cup and then just start incorporating alternately the rest of the colors (even if you have to do more than one layer). Make sure to not cover the layer of vanilla entirely with the next color, you are adding the rest of the colors in the form of "spots", let the batter make spots that take their own shape, the batter for these cupcakes is "runny enough" to blend with the rest of the batter and thick enough to not mix with it (if that makes sense?). So... when you add each color you can make your own pattern, for example:  In the left a green spot, then brown in the middle, then let some vanilla come through (or add more) and then the black, etc... Fill your cupcakes up to 3/4 but no more. Bake for about 15-16 minutes, insert a toothpick to check doneness, if the toothpick comes out clean the cupcakes are ready (do not overbake)

Here's how they will look:


 See? They turn out fluffy and beautiful! Now... for the frosting you can use your favorite vanilla buttercream recipe and just add neon orange gel food coloring (or you can even make a camo frosting if you use green, chocolate and vanilla and then just pipe it all together). But this is easier and I think way brighter as well! And people can still appreciate the "camo" part of the cupcakes!

If you want an easy buttercream recipe you can use this basic one:

1 cup of butter (room temperature)
3 cups of powdered sugar (sifted is better)
1 pinch of salt
2 tsp. vanilla
2 or 3 tablespoons of heavy whipping cream

Cream the butter and sugar together, add the rest of the ingredients (add more or less whipping cream to reach the desired thickness/consistency) and mix on high until fluffy and airy. Ah! YUM! Easy and delicious! Then just add the food coloring and mix just until evenly blended. I piped it using a closed star tip starting in the outside and ending in the center (kind of overlapping with every turn and circle).

There you have it! Camo Cupcakes with Neon Orange Frosting... FROM SCRATCH!

Enjoy!


© Paloma K.

Thursday, June 20, 2013

Black and White never tasted better!

Hello friends... and patient readers... patient because I don't blog often anymore but those of you who remain faithful to "The Coffee Shop" wow... THANK YOU! I appreciate it! I continue to bake and enjoy cooking... I just don't find the time to blog as much as I used to... But... here I am ... at least once a month to share about my baking experiences with "The Cake Slice Bakers"  and by the way... we are now On Facebook TOO so you can join us there to see what we're baking and learn from our own experiences as we experiment in the kitchen, we'll share our successes and our fails as well!

We are currently baking from the "Vintage Cakes" book by Julie Richardson... most cakes in this book have been a great success for all of us! We have unanimously raved about some outstanding cakes from that book, so please make sure you get it...

I must say that the "Black and White" seems to be everyone's favorite so far... We had friends over who enjoyed it with us... Hubby was just in some other "dimension" while eating it! He ate so much he gave himself a stomachache... and my friend Laurie said she "never wanted it to end" it was THAT GOOD!

This cake is formed by 2 chocolate layers of cake, the batter calls for some warm coffee, then once the cakes are baked, and cooled off, you cover the first layer with a sumptuous chocolate ganache, then add some of the AMAZINGLY DELICIOUS vanilla bean buttercream, place the other layer, spread the rest of the ganache on top and then entirely frost it with the rest of the buttercream... It was a bit tricky for me to not get the ganache and frosting mixed... the top layer was easier because I left it longer in the fridge before completely frosting, the frosting by the way was amazing, this buttercream required you to make a "meringue kind of thing" it has almost a "marshmallow" texture to it ...and then, after all those egg whites have been whipped with the melted sugar, you start adding butter and more butter... for some of our bakers this proved to be a little bit challenging.... maybe I just "got lucky" and it turned out just FANTASTIC! I am definitely keeping this recipe close by so I can make it again and again!

If you want to know exactly how this cake tasted... remember you can make it too... Get this amazing book! You will not regret it!

Now... some pictures of my cake:

A lot of stuff going on in the background, lol! Here you can see the ganache both in the middle and on the top layer

Here I am ready to completely frost it, the crumbs have been sealed with a thin layer of white frosting


 I hope you will take some time to check out our Facebook Page and our Blogroll so you can see how the rest of the Cake Slice Bakers did as they reveal their cakes!

© Paloma K.

Saturday, June 1, 2013

Craisins/Chocolate Chips Oatmeal Cookies

Hello everybody! You might be surprised with this post... It's been a while since I last wrote "out of the blue" I am usually just publishing something once a month (when it's time to reveal the "Cake of the Month" that I bake with my friends from "The Cake Slice Bakers" but two days ago I made a batch of absolutely delicious oatmeal cookies with craisins and chocolate chips and I thought I couldn't just keep this recipe to myself so I am sharing it today!

These cookies are absolutely fabulous, not overly sweet and just with a delicate hint of cinnamon which gives them a spicy background note, it's just very mild, you might not even be able to tell "it's cinnamon" but it's just perfect to blend with the rest of the flavors, so you can enjoy them all!

So... Here's my Recipe (which I adapted from the original Quaker Recipe for "Raisins Oatmeal Cookies")

Craisins and Chocolate Chips Oatmeal Cookies


Yield: Makes about 50 cookies

Ingredients
  • 1/2  cup of butter (room temperature)
  • 3/4  cup firmly packed light brown sugar
  • 1/2  cup granulated sugar
  • 2  eggs
  • 1  teaspoon vanilla
  • 1-1/2  cups all-purpose flour
  • 1  teaspoon baking soda
  • 1/2  teaspoon ground cinnamon
  • 1/2  teaspoon salt
  • 3  cups of quick or old fashioned, uncooked oats
  • 1  cup chocolate chips
  • 2/3 cup craisins

Preparation
Pre-heat oven to 350°F.
In a bowl combine flour, baking soda, cinnamon and salt, whisk it all together until it's all incorporated. Set aside.
In a large bowl, beat butter and sugars on medium/high speed of electric mixer until creamy. Add eggs and vanilla; beat well. Add combined flour, baking soda, cinnamon and salt; mix well (do not over-mix). Add oats mix well.Then using a spatula fold in the chocolate chips and craisins until it's all incorporated.
Drop dough by rounded tablespoonfuls (you can use a small ice cream scoop) onto ungreased cookie sheets.
Bake 9 to 10 minutes or until light golden brown. Cool 1 minute on cookie sheets; remove to wire rack. Cool completely. Store tightly covered.

Enjoy!


© Paloma K.

Monday, May 20, 2013

The Pink Cake

Hello everybody, here I am again, with my monthly post! I feel weird to not be as active blogging here but I hope to be able to "get back at it" soon! Not much is going on here, we still have ONE car only, I mentioned 1 of our cars got stolen in my last post, we don't see the possibility of buying another car anytime soon... My 2 yr. old is potty trained! It took me a day! but I shouldn't say it took "ME" I should say that with God's help and with her good attitude this was done quickly! She only had 1 real day of being trained, three days ago, after that she hasn't had any accidents EVEN AT NIGHT! It's amazing that she just "GOT IT" she even wakes up in the middle of the night and lets me know she needs to go potty! What a big girl! It's a little bittersweet I must admit, as I see her grow up so quickly makes me realize I no longer have a "baby" ... But let's not talk more about potty training, especially because we're about to start talking about CAKE!... it's time to reveal the "cake of the month" ... as you know I bake with

The Cake Slice

 Which by the way, we're now on Facebook too! LIKE us here. Well, we, The Cake Slice Bakers, have to bake 1 different cake each month, as you may or many not know, this year we're baking from the book Vintage Cakes by Julie Richardson, and it's been awesome! None of the cakes has disappointed, pretty much everyone has enjoyed each of the cakes so far and that makes me very happy! For May the Cake that won the "poll" was "The Pink Cake" which is a triple layered chocolate cake with a Raspberry Buttercream... I voted for this cake, and the cakes that I vote for usually never win LOL! so I was thrilled to try this one! I must say I was tempted to change the raspberries for strawberries because I am not that big of a fan for raspberries... but I usually like to adhere to the recipe just as it is, even when it calls for ingredients I would not normally use because I see it as an opportunity to try things that might not be my favorite or that I am not so "sure" of... and sometimes I get great results (not always) but I am happy to say that I am definitely happy it worked this time!

The intense color of the raspberries gave the frosting its beautiful pink (and totally natural) color and delicious fragrance! Plus the fact that the raspberries are pureed and strained to remove the seeds "did the trick" and made them "the special ingredient" of this cake! giving it a slight tart freshness that went great with the deep chocolate flavor of the cake.


I went for something simple and decided to make 2 9" layers instead of 3 8"
 I thought this cake would be perfect to have for hubby's birthday... I know it looks a lot like a very girly cake but trust me... any man that is not afraid to have "The Pink Cake" for his birthday will really enjoy it!

I used fresh raspberries for decoration

My husband wasn't sure if he'd like it or not, he's not a fan of raspberries either and he's just happy to have "chocolate on chocolate" kind of desserts... but he trusted me and he was actually shocked by the results, when he had the first bite he actually dropped his hands on the table in actual disbelief, his jaw dropped as well and he just managed to say "this is awesome"

he enjoyed it so much!
Dear friends of ours enjoyed the cake with us, they liked it very much as well.

Our friends Venessa and Bill were happy to enjoy this cake with us!

I am so happy with this cake, it will definitely be one of those "go to" recipes, plus it's pretty simple to make.

It's great that hubby's birthday is in May because I got to have a slice for Mother's Day as well!
If you would like the recipe for this cake, I encourage you to get this book! Really do! You will not regret it! If you love good cakes this is a must have!


© Paloma K.

Wednesday, February 20, 2013

Red Velvet Cake with Mascarpone Cream Cheese Frosting

Hello everybody! As you have probably noticed I haven't been blogging as I used to and even the "Coffee Friday" tradition has been stopped, I am taking care of business in my home, baking tons and just enjoying my girls and my new roles in church as a translator and other things that I am honored to be involved with... So right now my blog is suffering and even when I miss it I am ok with it because I know life is like that and I am busy living it! So much blessings to enjoy!

A tradition that will remain is my CAKE OF THE MONTH... I am part of The Cake Slice Bakers and we choose one cake each month and then reveal our cake on the 20th in our blogs! For February we chose "Red Velvet Cake with Mascarpone Cream Cheese Frosting" and according to my husband it was a great choice!

The original recipe makes a two layered 9" round cake but I decided to go for cupcakes instead and made them for Valentine's Day, cupcakes are not only "cute" but also easy to share with friends or in this case with people at hubby's work.

Here are my cupcakes:


 I didn't take many pictures of the process or even an individual cupcake, it's been a few rough weeks here in our house and I guess I wasn't very inspired... but at least I took a picture of a cupcake before hubby finished it...


I guess what doesn't help is the fact that I can't really eat cake, so I only enjoyed a small bite of one... they were good but hubby actually said they were awesome! So... I highly recommend these... here is the recipe:

Red Velvet Cake with Mascarpone Cream Cheese Frosting
Makes one 9" double layered round cake or 24 standard cupcakes
Slightly adapted from: Vintage Cakes by Julie Richardson

Ingredients: (All ingredients should be at room temperature unless it's indicated otherwise)

For the cake
  • 2 1/2 cups sifted cake flour (important to sift before measuring)
  • 1/2 cup lightly packed unsweetened Dutch Processed Cocoa
  • 2 tsp. baking powder
  • 1 tsp. salt
  • 3/4 cup safflower oil
  • 2 tsp. vanilla extract
  • 1/2 tbsp. red gel color
  • 3/4 cup unsalted butter
  • 1 3/4 cup sugar
  • 4 eggs
  • 2 egg yolks
  • 1 cup buttermilk

For the frosting (this frosting recipe makes about 3 cups, enough to fill and top but not completely frost an 8 or 9" layer cake or 24 cupcakes)
  • 8 oz. cream cheese
  • 8 oz. mascarpone cheese (cold)
  • 1/2 cup heavy cream (cold)
  • 1/3 cup sugar
  • 1 tbsp. pure vanilla extract
Directions:
  • Center an oven rack and preheat oven at 350F
  • In a small bowl sift together flour, cocoa, baking powder and salt, whisk until well mixed.
  • In another small bowl combine oil, vanilla and food coloring.
  • In the bowl of a stand mixer (using paddle attachment) cream butter and sugar together on med-high speed until fluffy about 5 minutes. Scrape sides of the bowl as necessary.
  • With mixer on low speed drizzle the oil mixture into the batter until well combined.
  • Turn the mixer gradually up to med-high speed and beat until fluffy again. 
  • Blend in the eggs and egg yolks one at a timeadding the next one as soon as the previous one has disappeared into the batter, no longer! It is important to not overmix.
  • With the mixture on low speed, add the flour mixture in three parts, alternating with the buttermilk in two parts, beginning and ending with the flour.
  • After each addition, mix until just barely blended and stop and scrape the bowl. Stop the mixer before the last of the flour has been incorporated and complete the blending by hand with a rubber spatula to ensure you do not overbeat the batter.
  • Divide the batter evenly into the prepared pans (or muffin tins). Rap the pans firmly on the counter to release any  air bubbles.
  • Place the pans in the middle of the oven and bake until the centers of the cake spring back when lightly touched (about 28-30 mins or about 20 minutes if baking cupcakes). Cool n rack for 30 mins. before removing from pans. Be careful when removing from the pans, as they are fragile and they could crack. Leave the parchment paper on until you assemble the cake. 
Make frosting:
  • Using a stand mixer with paddle attachment beat the cream cheese until it's smooth and uniform in texture. Add mascarpone, cream and sugar. 
  • Beat on low speed until combined, scraping the sides of the bowl well to ensure all ingredients are incorporated. 
  • Kick the mixer up to high speed and blend the frosting for about 1 minute or until it looks creamy and thick. Turn down to low speed, add vanilla and mix just until blended.
(This frosting keeps in the fridge for up to 5 days)

Assemble the Cake:
Once the cake has completely cooled off place one of the layers, top side up on a serving plate. Using a metal spatula spread half of the frosting over the top of the cake, spreadint it slightly over the edge of the cake. Place the next layer of the cake, top side up again, on top of the frosted layer. Spread the remainder of the frosting over the top of the cake.

This cake keeps well in an airtight container in the refrigerator for up to 2 days, allow at least 1 hour for the cake to come to room temperature before serving.

Enjoy!

© Paloma K.

Sunday, January 20, 2013

The Cake Slice and The Classic Cake

Hello everybody! Sorry I haven't been around as much... I am doing good stuff though! Being a mom and enjoying the terrible two's -OY!- but it's all a blessing, even those little things that now frustrate me... I know it's just a stage and this too shall pass and I might soon look back and feel like it passed way too quickly!

So... as many of you know I belong to a Secret Online Baking Group called The Cake Slice, we are a group of ladies who love baking and we choose a different book each year to bake from, right now we are baking from "Vintage Cakes" by Julie Richardson and it's been such a joy to bake from this book!

For January, two of the 4 cakes to choose from were tied at the end... so we had the choice to bake either of them... I chose "The Classic" and I am glad I did... I actually talked to a friend (Laurie) about it and about the fact that I can't really eat much cake anyway... and she had the great idea to use it for her hubby's birthday! They're all great friends so we made it a "date" and we all had lunch at her house yesterday with her family to enjoy her food and my cake... her husband really enjoyed it and my husband was almost like he was in heaven... he couldn't stop saying how much he loved it!

I am not sharing the recipe this time... but I am sharing with you "the process" of making it... I hope it's still fun!

My first two layers actually sunk! I was distracted and used baking soda instead of baking powder!
Chocolate ganache in the making! Semisweet chocolate + heavy whipping cream + dark brown sugar = awesomeness!
Second batch of cake layers were great! The recipe asked to make 4 layers out of the two but I used bigger round pans and preferred to have 2 thick layers than 4 thin ones.
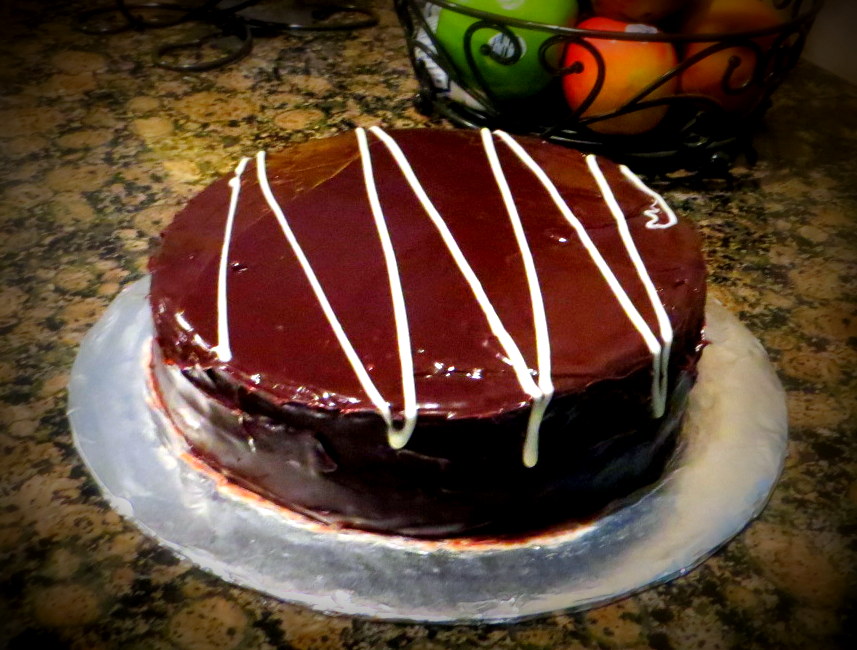
This would've been the final product but I thought it looked too simple and dark....

So I gave it an extra touch with melting some white chocolate with butter and heavy cream to decorate the top.

Here's the birthday boy waiting for his wife to give him a slice!
Now... this is a cake slice! although it was supposed to be "yellow cake" and I found it "whiter than yellow" Delicious though!

Success!

© Paloma K.

Thursday, December 20, 2012

Mississippi Mud Cupcakes with Marshmallow Frosting!

Hello everybody! As you know (I hope) I am part of an amazing baking group... The Cake Slice !

This time we all voted, like we do every month, and the "winner" was:

Mississippi Mud Cupcakes with Marshmallow Frosting

And AH! You have to trust me... They did not disappoint! They were MUDDY and good! Well... not muddy... not gooey but just so chocolatey moist! And the marshmallow frosting was just perfectly delicious and went really well with the cupcakes! I decided to half my recipe, 24 cupcakes would've been too many! But the 12 cupcakes I made were certainly enjoyed!

The Marshmallow Frosting required lots of precision and good timing! There were no "marshmallows" involved... you had to make your own! ... it was made with thoroughly beaten egg whites and candy (melted sugar until it reached 242 F) and then mix it all together at the exact time when the caramel reached the temperature (I had NO THERMOMETER!!!) and the egg whites were just right and stiff! I was nervous about it but ... everything went well! I am debating if I should post the recipe as well... I think I might but I am falling asleep and just exhausted from all the baking I've been doing, just today I baked about 300 cookies and 24 empanadas! but I didn't want to wait any longer because we're supposed to reveal our cakes on the 20th of each month and I didn't want to be late!

So... it was fun and totally worth baking these cupcakes! The recipe is a really great one from a book I've come to love: Vintage Cakes by Julie Richardson... If you don't own it yet and you love traditional cakes, this is a must have!

Here are the pics (horrible pictures by the way) of my cupcakes... And yes... I am asking Santa for a new camera! LOL! Santa might be late though!

Perfect and stiff egg whites, just right!

This is the marshmallow frosting, had to be piped immediately!

My finished cupcakes!

Merry Christmas!

© Paloma K.

Monday, December 3, 2012

Christmas Cookie Series - Haystacks!

Hello everyone! Here I am just trying to at least get to post something! I will also dedicate some of my time today to stop by some blogs that have been kind enough to leave a comment here! Thank you all! for reading, liking, sharing, pinning!

Now... Let me share a quick and easy recipe to make the very popular "Haystacks" which are also known as "Chinese Cookies" and "Chow Mein Cookies"

There are many recipes out there... but these is the one I've found to be simpler and yummy... of course you can modify it to your own taste.


 Haystacks (aka chow mein cookies/chinese cookies)

Ingredients
  • 1 cup semisweet chocolate morsels
  • 1 cup butterscotch morsels
  • 1 can (5 oz each) Chow Mein Noodles (5 oz = about 2-1/2 cups)
  • 2 cups miniature marshmallows (optional, I don't use these)
  • 1/2 cup dry roasted peanuts
Directions  (First of all line two big baking sheets with parchment paper)
  1. Melt chocolate and butterscotch morsels in the microwave (on high for about 2 or 3 minutes, make sure you stir ONE time, after 1 minute). Once it's melted, stir until smooth.
  2. Add chow mein noodles, marshmallows (if using) and peanuts. Stir until well coated.
  3. Drop mixture by spoonfuls onto your prepared baking pans (not much space is necessary between each cookie, just enough so that they aren't touching). Refrigerate 1 hour or until firm. Enjoy!
Note: Store in sealed container in cool area or freeze so they stay good longer, to thaw just get them out of the freezer (to room temperature) and wait a couple of minutes.


© Paloma K.

Saturday, December 1, 2012

Christmas Cookies Series - Peanut Butter Blossoms

Hello everyone! Thank you all for your comments... I promise I'll get to each one of them eventually! It's a busy season and I'm also baking not only for myself but baking for exchanges (even gift exchanges) and also trying to sell some of the cookies I make (and one or two chocoflan cakes! why not?!)

Right now I am going to share the recipe to make another Favorite Christmas Cookie... "Peanut Butter Blossoms", some people also call them "Hershey Kisses Cookies". I love these! but I am not sure if it's really the flavor I am so in love with or just the way they look! I know they are good... but also... love starts through the eyes... and these lovely cookies sure make you fall for them "at first sight"

Here is my recipe:


 Ingredients: (all ingredients should be at room temperature)
Yield: Makes about 80

  • 1 cup butter (softened)
  • 1 cup peanut butter 
  • 1 cup packed brown sugar
  • 1 cup granulated sugar
  • 2 eggs
  • 1/4 cup milk
  • 2 tsp. vanilla extract
  • 3 1/2 cups all purpose flour
  • 2 tsp. baking soda
  • 1 tsp. salt
  • extra: 1/2 cup granulated sugar for rolling (decorative purposes mainly)
  • 1 bag -12 oz.- of Hershey Kisses (milk chocolate) 

Elaboration:

Preheat oven at 350F
Slightly grease cookie sheets
Combine flour, baking soda and salt. Set aside.
Cream butter, peanut butter, sugars until smooth.
Beat eggs one at a time, stir milk and vanilla. Stir in dry ingredients just until incorporated.
Make little balls (about 1") with dough, roll them in additional sugar. Bake them in preheated oven for about 8 minutes. Press 1 kiss of hersheys into each cookie and bake for 2 more minutes. Cool in wire rack.

Note: to make the dough balls I use a small ice cream scoop and drop them on the sugar where I will roll them, that will make the dough easier to handle too.

Enjoy!

© Paloma K.

Tuesday, June 26, 2012

Tuesday of Quotes and Chocolate Cupcakes

As it's now a tradition (or at least it used to be and I am trying to bring it back) on Tuesdays I post some quotes, inspirational thoughts or some joke... Today... is no exception ... so here they are... some funny quotes for the day:

Oscar Wilde
I am so clever that sometimes I don't understand a single word of what I am saying.

Robert Frost
A bank is a place where they lend you an umbrella in fair weather and ask for it back when it begins to rain.

Charles Schulz
Don't worry about the world coming to an end today. It is already tomorrow in Australia.

-o-o-o-o-o-
 
And now... the recipe! Do you remember that I made some Chocolate Cupcakes with Festive Frosting for my husband on the Friday before Father's Day? Well... maybe you don't but I know I promised to share the recipe and here I am.... you might feel suspicious  when you read the ingredients! No eggs? No milk? White vinegar? Well... don't be so suspicious... just try them! They are REALLY, REALLY GOOD!


Delicious and Fluffy Chocolate Cupcakes
  • 1 1/2 cups flour
  • 1 cup granulated sugar
  • 1 teaspoon baking soda
  • 1 teaspoon salt
  • 1/3 cup cocoa powder
  • 1/2 cup vegetable oil (preferably safflower)
  • 1 cup water
  • 1 teaspoon vanilla extract
  • 1 tablespoon vinegar

Directions: 

Preheat oven at 350 F.
  1. Mix all ingredients together until moist and well blended.
  2. Line a  standard muffin tin with cupcake liners (I used Reynolds Aluminum "Stay Brite" they are AWESOME! And if you use those you don't even need a cupcake pan you can just use any regular baking sheet! How cool is that)
  3. Fill the cups about 3/4 and bake for about 20-25 mins. or until an inserted toothpick comes out clean.
  4. Make frosting while cupcakes bake, once the cupcakes are ready let them cool completely on a wire rack before you frost them.
 Festive Frosting

Ingredients

  •  4 tbsp. unsalted butter, softened
  •   8 tbsp. shortening
  • 3 cups confectioners' sugar, sifted
  • 1/4 teaspoon pure vanilla extract
  • some water in case frosting is too thick until you reach desired consistency.

Directions

  1. Beat butter and shortening with a mixer on medium-high speed until pale and creamy, about 2 minutes.
  2. Reduce speed to medium. Add sugar, 1/2 cup at a time, beating after each addition, about 5 minutes. (After every 2 additions, increase speed to high, and beat for 10 seconds, then reduce speed to medium-high). Add vanilla, and beat until buttercream is smooth. Add water if needed or more sugar until you reach desired consistency. Use immediately, or cover and refrigerate for up to 3 days. (Bring to room temperature, and beat on low speed until smooth before using.)
  3. Add your favorite colors, you can divide the frosting in two or three to use different colors for the cupcakes. Gel coloring will work even better than the regular liquid one, I used liquid one but gel coloring will give you brighter colors.

Note: If you have M&M's at hand... (especially miniature ones) play with them and get creative with the colors. Make it all look pretty! Plus they add a nice touch of crunch and more chocolate flavor!


Enjoy!

© Paloma King

Wednesday, June 20, 2012

Brooklyn Blackout Cake! - The Cake Slice

June 20th! That's today! And as every 20th of each month we, The Cake Slice Bakers, finally reveal The Cake we baked for the month. I love being part of The Cake Slice because I love the idea of "baking with others" even when we are far away... we choose a Recipe Book each year, and each month we vote for a cake to bake from that book! (we have 4 options to choose from each month) and then... we get to bake it and then reveal our master piece on the 20th (never earlier) of each month.

This time the winner cake was "Brooklyn Blackout 2003" and I think we were all winners with this! I was very excited because hubby loves chocolate, so I decided I would make it for father's day... then I even thought about sharing it in church to celebrate the daddies of my lifegroup (as we call it) but nobody ate it (there wasn't a big turnout in our lifegroup that Sunday... probably because it was father's day) anyway if you read yesterday's post you already know this... so... I ended up bringing the whole cake back home where hubby got to try it... I was anxious to see his reaction, I hadn't tasted it yet, nobody had... and all he said was: "WOW! Make sure you invite people over to eat this cake... because it DESERVES TO BE EATEN" I was so happy... so I did... I had friends over and I even sent them with some cake to take home with them... these were some of the comments from my friends:

Laurie D: "Tastes like a slice of heaven" 

James D: "Where had you been all my life?" 

Mrs. Diane H: "Thank you SOOOO much for the cake! That was without a doubt some of the best chocolate cake I have every had!!! And I have had a lot of chocolate cake in my lifetime. LOL!!!"

 So... you get an idea how much people liked it! Here are some pictures of the cake... I am going to share the recipe at the end but I truly want to encourage you to get this book... The Cake Book by Tish Boyle. This book is more than a recipe book but it's a guide to bake perfect cakes and understand how "a cake is created" like which tools and ingredients to use ... and why! everything in a very easy to understand "language".

Here are some of the pics... To see entire album Click Here 


Brooklyn Blackout 2003
Yield : Makes one 9-inch cake, serving 10 to 12

Ingredients

Chocolate Blackout Cake:

  • 1½ cups (6.4 oz/181 g) all purpose flour
  • 1 cup (2.9 oz/85 g) natural (not Dutch-processed) cocoa powder
  • 1½ teaspoons baking powder
  • 1½ teaspoons baking soda
  • 1 teaspoon salt
  • 2 cups (14 oz/400 g) granulated sugar
  • 2 large eggs
  • 1 large egg yolk
  • 1 cup (240 ml) buttermilk
  • ½ cup (1 stick/4 oz/113 g) unsalted butter, melted
  • 2 teaspoons vanilla extract
  • 1 cup (240 ml) hot brewed coffee

Chocolate Pudding Filling:

  • 4 large egg yolks
  • 2/3 cup (4.6 oz/132 g) granulated sugar
  • 2 tablespoons plus ½ teaspoon cornstarch
  • 1/8 teaspoon salt
  • 1 cup (240 ml) water
  • 2/3 cup (160 ml) heavy cream
  • 3 ounces (85 g) semisweet or bittersweet chocolate, finely chopped
  • 1 teaspoon vanilla extract

Fudgy Chocolate Frosting:

  • 4 ounces (113 g) unsweetened chocolate, coarsely chopped
  • 11 tablespoons (5.5 oz/156 g) unsalted butter, softened
  • 1 2/3 cups (6.7 oz/191 g) confectioners sugar
  • 2 teaspoons vanilla extract

Directions

MAKE THE CAKE

1. Position a rack in the center of the oven and preheat the oven to 350°F. Grease the bottom and sides of two 9" round cake pans. Dust the pans with flour.
2. Sift together the flour, cocoa powder, baking powder, baking soda, and salt into the bowl of an electric mixer. Add the granulated sugar and, using the paddle attachment, mix at low speed until blended.
3. In a medium bowl, whisk together the eggs, egg yolk, buttermilk, melted butter, and vanilla extract. At low speed, add the egg mixture to the dry ingredients in a steady steam. Scrape down the sides of the bowl with a rubber spatula, then beat at medium speed until well blended, about 1 minute. Add the hot coffee, mixing just until blended. Remove the bowl from the mixer stand and stir the batter up from the bottom of the bowl a few times to thoroughly blend it. Scrape the batter into the prepared pans, dividing it evenly and smoothing the tops.
4. Bake the cakes for 30 to 35 minutes, until a cake tester inserted into the center comes out clean. Cool the cakes in the pans on wire racks for 10 minutes.
5. Invert the cakes onto the racks and cool completely.

MAKE THE FILLING
6. In the bowl of an electric mixer, using the paddle attachment, beat the egg yolks, sugar, cornstarch, and salt at medium speed until pale, about 1 minute.
7. In a medium heavy saucepan, combine the water and cream and bring to a boil over medium heat. Remove the pan from the heat and whisk about half of the hot cream mixture into the yolk mixture. Whisk this mixture back into the remaining cream mixture in the saucepan. Cook over medium heat, whisking constantly, until the mixture comes to a boil. Continue to boil, whisking, for 1 minute. Remove the pan from the heat and whisk in the chocolate until completely melted.
8. Pass the filling through a fine-mesh sieve into a small bowl. Stir in the vanilla extract. Cover the surface of the pudding with plastic wrap and refrigerate for at least 2 hours, until chilled.

MAKE THE FROSTING
9. Put the chocolate in a medium stainless steel bowl and place over a pot of barely simmering water. Heat, stirring frequently, until the chocolate is completely melted. Remove the bowl from the pot and set the chocolate aside to cool until tepid.
10. In the bowl of an electric mixer, using the paddle attachment, beat the butter at medium speed until creamy, about 1 minute. Add the confectioners’ sugar and beat at medium-high speed for 2 minutes, scraping down the sides of the bowl as necessary. Beat in the vanilla extract and melted chocolate, then beat until well-blended and creamy, about 1 minute.

ASSEMBLE THE CAKE
11. Using a long serrated knife, cut each cake layer in half horizontally, to make 4 layers. Reserve one layer. Place another cake layer, cut side up, on a serving plate. Whisk the chilled filling until smooth. Using a small offset metal spatula, spread half of the filling over the layer. Top with another cake layer and spread it with the remaining filling. Top with a third cake layer, smooth side up.
12. Break half of the reserved cake layer into large pieces and place them in the bowl of a food processor (save the remainder of the cake layer for snacking). Process the cake to fine crumbs, and set aside.
13. Using a narrow metal spatula, frost the top and sides of the cake with the frosting. Pat a generous amount of cake crumbs onto the sides of the cake, pressing them lightly into the frosting. Sprinkle the remaining cake crumbs over the top of the cake. Serve at room temperature or slightly chilled.

Notes

STORE in the refrigerator, loosely covered, for up to 2 days.

Enjoy!


Paloma K.