Printfriendly

Print Friendly and PDF
Showing posts with label cake slice. Show all posts

Thursday, February 20, 2014

Velvety, Lemony, Perfect!

Hello everybody! I can't believe another month has gone by! Where are days going? How can it almost be March? Wasn't it just Christmas? I feel like time is just escaping right in front of me! I am almost 35 as well!!! What in the world? Wasn't I just the age of my friend's daughter? How dare she be 18? How dare she have her prom in April? Wasn't I just 18? Anyway... I guess it's just starting to hit me! like... really hit me!

But... in Mexico we say "Las penas con pan son buenas" which translated means "Even pain is good if there's bread" and of course we have these weird expressions for everything in Mexico... and I guess if you pay attention to that "saying" you'll understand why we, Mexicans, are sooooo into food! Like... really into it! It's almost like a cult! LOL!  And there's obviously always truth in those popular sayings... Everything "feels better" when you eat! (therefore so much obesity I guess!) ... So... let's make the pain of getting older go away if just for a second with a little cake!

It's time to reveal the "Cake of the Month" ... we, The Cake Slice Bakers are baking through the "Great Cakes" book (by Carole Walter) ... this book has turned out to be quite a disappointment for some... I've actually enjoyed baking from it! and hubby has not complained at all either... It is a very old fashioned book... but there's a certain enticing beauty to old fashioned recipes! This month the cake that won our poll was

Lemon Velvet Squares 


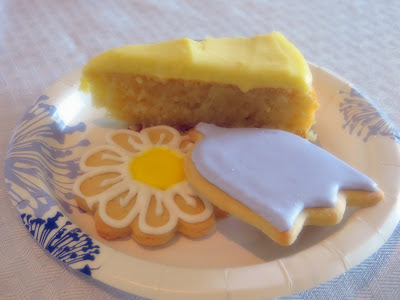
They were... delicious! SOOOOOOOOOOO delicious! At least... we truly, deeply loved them! For the very first time we all REALLY loved a lemon cake/dessert! It wasn't overly lemony at all... and the lemon glaze that Mrs. Walters suggests to go with this cake is just the perfect way to top this very perfect, subtle, delicate, beautiful cake!

Since the recipe has already been published online I will share it with you today as well:


Lemon Velvet Squares 
(slightly adapted from "Great Cakes" by Carole Walter Recipe)
Yield: ( about 8-10 servings)

Ingredients:
  • 2 1/4 cups sifted cake flour
  • 2 1/2 teaspoons baking powder (I use aluminum free)
  • 1/2 teaspoon salt
  • 1/2 cup unsalted butter
  • 1 teaspoon freshly grated lemon zest
  • 1/2 teaspoon freshly grated navel orange rind
  • 1 1/3 cups granulated sugar
  • 3 large eggs
  • 1/3 cup water
  • 3 tablespoons fresh lemon juice
  • 1/4 cup fresh orange juice(or you can even use the "Simply Orange" juice which is all I had)
  • 1 tablespoon powdered sugar, for garnish(or make a simple lemon glaze by creaming together 2 tbsp. unsalted butter at room temperature and 1 cup of powdered sugar and then just add 2 tsp. fresh lemon juice, 1 tsp. hot water -add a few more drops if too thick-, 1/2 vanilla extract and blend until it is pourable and smooth.)

Directions:
  1. Preheat oven to 350°; butter a 13x9 inch baking pan. 
  2. Sift together the flour, baking powder, and salt; set aside.
  3. Cut the butter into 1" pieces and place in the large bowl of a stand mixer with paddle attachment.
  4. Add in the lemon and orange rinds and soften on low speed.
  5. Increase to med-high and cream until smooth and light in color, about 1 ½-2 minutes.
  6. Add the sugar gradually and take a total time of about 6-8 minutes to blend it in well (scrape the sides of the bowl occasionally).
  7. Add in eggs, 1 at a time (add the next one as the previous one has completely disappeared but don't overmix), scrape down the sides of the bowl as needed.
  8. Decrease speed to low; in a small bowl, combine the water, lemon juice, and orange juice.
  9. Add the dry ingredients alternating with the liquids, dividing the flour mixture into 3 parts and the liquid into two parts, starting and ending with the flour.
  10. Mix just until incorporated after each addition; do not worry if the batter appears to curdle, it should smooth out after the flour is blended inches.
  11. Scrape the sides of the bowl and mix for 10 seconds longer. 
  12. Spoon batter into prepared pan, smoothing with the back of a spoon.
  13. Center the pan on the oven rack and bake for 30-35 minutes, or until the cake is golden brown on top, springy to touch, and begins to come away from the sides of the pan. 
  14. Remove pan from oven and set on a cake rack to cool.
  15. Just before serving, place powdered sugar in a fine mesh strainer and dust the top of the cake (or pour the easy lemon glaze that I mentioned in the ingredients section); cut into squares and serve.

Enjoy!

© Paloma K.

Monday, January 20, 2014

Chocolate Chip Pound Cake with The Cake Slice Bakers

This month  our group  picked a simple, traditional and may I say delicious Pound Cake... I think, for me, this will be my "go to" recipe when it comes to Pound Cake. Not too dense/heavy, very delicious vanilla flavor with a beautiful crumb! We are currently baking from Great Cakes by Carole Walter and this book is loaded with recipes (although not that many pictures) and so far, the recipes from this book have worked for me. I do look forward to baking a bit more challenging cakes, I miss making puddings and frostings for our group... but I must say my "lazy side" has enjoyed the easy method of the cakes that have been picked.

You can make this pound cake in a snap! It is great to enjoy over coffee when having guests, it doesn't use any unusual ingredients and ... it's so easy to make that I actually made 2  of these within the same week. You can choose from three versions of this cake, a "nutty" one, a "spirited" one and a "chocolate chip"... which is the one I picked and ah! I am so happy I did... The chocolate chips are processed to make them smaller (in a food processor)... ehem... believe it or not... I don't own a food processor yet... so I used the blender... which gave me a bit of trouble because the recipe warns to not over-process the chips (or you'll end up with lots of powder instead of smaller chips) What I did to fix this was that I actually used a sifter to separate the bigger chips from the smaller ones. The chocolate chips, once they were processed added to this cake a delicious chocolaty creaminess in every bite and I loved that the chocolate chips didn't have the "perfect chip shape" but were rather rustic and made it look more "from scratch" I feel.

The cake batter reminded me of a Dairy Queen "Oreo Blizzard"


 So... fear not! The delicious "chocolate chips" that turned into dust were put into good use though... I used them to garnish each slice of cake! I made a classic vanilla whipped cream and dusted it with the semi-sweet "powdered" chocolate chips. It was the perfect complement for the cake.


Get this book and you'll get this and many more recipes that I am sure will give you lots of fun in the kitchen and a good time with family and friends.


© Paloma K.

Sunday, October 20, 2013

Bittersweet! - Last cake of the year

Hello everybody! It's once again time to share the "Cake of the Month". In The Cake Slice Bakers we are closing our baking year. During 2012-2013 we baked from Vintage Cakes Book by Julie Richardson and it was just a total and absolute delight. The recipes we tried were amazing and we all truly recommend this book! It is definitely a MUST HAVE.

 Because it is our last cake from the book and our last official month of our baking year we each had the opportunity and freedom to pick any cake from the book! I almost immediately knew which cake I would bake and when I asked hubby to pick a cake for me to bake I was delighted to see he picked the one I wanted to bake!

Here it is:

Watergate Cake with Impeachment Frosting
According to the author of the book this cake is from the early 70's and it is a pistachio cake with pistachio frosting.

Cake batter mixed with pistachio pudding, yes, all from scratch

I loved the beautiful golden color of the cake layers, the luscious cream was infused with pistachio pudding as well.


Caramelized pistachios for garnish
Because this cake had to stay refrigerated I couldn't garnish it to make it look prettier otherwise the caramelized pistachios would've gotten soggy and just not good to enjoy. 

Sliced and garnished!

Each slice could be garnished with the caramelized pistachios although I gave my guests the option to have them on the side instead since hubby didn't like the pistachios on the cake. My friends said they loved the caramelized pistachios AND the cake (I loved this cake!!!) but most of them preferred them separately... I am glad I offered the caramelized pistachios as an option. This cake was super moist and flavorful and the pistachio just adds a subtle flavor that is not overpowering or overwhelming, just really delicious, buttery, nutty, PERFECT!

Every ending is bittersweet... There's the sadness to end a chapter and the excitement to start another one! I can't wait to start baking from our new book! (sorry I still can't reveal the name!). I have been honored to be leading such a wonderful group of ladies at The Cake Slice (Like Us on Faceboook) and I hope we'll continue to bake for many more years together! If you'd like to join our secret group (we never reveal what we're baking until the 20th of every month) let me know... I'll be happy to share with you how you can join us (it's very simple! The main requirements are: love baking, have a blog and want to eat cake).

So... now... let me invite you to some other blogs. My friends and fellow bakers baked great and beautiful cakes too... make sure you do some blog hopping to see what they picked!

© Paloma K.

Saturday, July 20, 2013

Boston Cream Pie-Lets

Hello everybody, it's again time to reveal our "Cake of the Month" if you've read this blog before then you know that I am part of: The Cake Slice Bakers  , we are an online group of bakers, we choose a different book each year and vote on a different cake each month, then we keep the secret for the entire month until it's time (every 20th) to finally reveal what we baked... Of course you don't have to wait a whole month to "be part of the fun" we also now have a Facebook Page where we get to talk, share tips, ideas and even our most embarrassing disasters in the kitchen! So go ahead and like us there, please.

So, this year we have been baking from the book Vintage Cakes by Julie Richardson and it has been a lot of fun, there are definitely many recipes that I will be making again! This month we baked "Boston Cream Pie-Lets" and it was sooo good! Hubby wasn't that impressed... He said it reminded him of just a "Chocolate Eclair Torte" I agree, it does remind you of that but... just improved! I loved it that instead of having a whole "Boston Cream Pie" this version makes individual mini cakes... served in pudding cups (I just bought smaller glasses, didn't have pudding cups, my presentation is not that great, sorry!) but the flavor is incredible... The original recipe calls for a vanilla bean... but being that 1 vanilla pod costs about 9 dollars I just used vanilla extract for the pudding which is also made from scratch!
 

When I made the cake for this "pie-lets" and I got it out of the oven (which by the way... I halved the recipe) I was enchanted by the wonderful color and aroma... I loved even the fluffy/airiness of the cake batter and the flavor was just subtle and heavenly... perfect! When I tried it I even wondered if I really wanted to "do anything else" with it!

 Interestingly I have no round cookie cutters (or anything sharp enough that was the size of the serving glasses), so I used the "glass itself" (and it wasn't pretty, did you see that?) to cut the miniature cakes for each glass... I got 4 individual desserts... I only got to try a spoonful of one... I need to watch my calories! But I soooooooooooo wanted to keep eating! Definitely a keeper recipe! Hopefully I will make it look prettier next time...

The Miniature Cakes were then sliced in half horizontally to make "bottom and top" layers of cake.


From Bottom to top: Pudding, cake, pudding, cake and then it will be covered with chocolate ganache

This time was almost an "accidental" project... I was running out of time to make my cake and then... I chose a day when I almost was in a car accident and had a ton of other things to do... But still... it's an enjoyable dessert to make... the mini cakes are adorable! Go ahead and buy this book... You will not regret it!

I heard that the amount of pudding was very abundant but I think I overestimated it and miscalculated the size of the glass

Enjoy!
Edited to Add: After one whole day in the fridge, hubby had another one and LOVED IT! He devoured it! So I guess this is one of those desserts that are better the next day... I am so happy it was that successful! :) Loved it!

  © Paloma K.

Thursday, June 20, 2013

Black and White never tasted better!

Hello friends... and patient readers... patient because I don't blog often anymore but those of you who remain faithful to "The Coffee Shop" wow... THANK YOU! I appreciate it! I continue to bake and enjoy cooking... I just don't find the time to blog as much as I used to... But... here I am ... at least once a month to share about my baking experiences with "The Cake Slice Bakers"  and by the way... we are now On Facebook TOO so you can join us there to see what we're baking and learn from our own experiences as we experiment in the kitchen, we'll share our successes and our fails as well!

We are currently baking from the "Vintage Cakes" book by Julie Richardson... most cakes in this book have been a great success for all of us! We have unanimously raved about some outstanding cakes from that book, so please make sure you get it...

I must say that the "Black and White" seems to be everyone's favorite so far... We had friends over who enjoyed it with us... Hubby was just in some other "dimension" while eating it! He ate so much he gave himself a stomachache... and my friend Laurie said she "never wanted it to end" it was THAT GOOD!

This cake is formed by 2 chocolate layers of cake, the batter calls for some warm coffee, then once the cakes are baked, and cooled off, you cover the first layer with a sumptuous chocolate ganache, then add some of the AMAZINGLY DELICIOUS vanilla bean buttercream, place the other layer, spread the rest of the ganache on top and then entirely frost it with the rest of the buttercream... It was a bit tricky for me to not get the ganache and frosting mixed... the top layer was easier because I left it longer in the fridge before completely frosting, the frosting by the way was amazing, this buttercream required you to make a "meringue kind of thing" it has almost a "marshmallow" texture to it ...and then, after all those egg whites have been whipped with the melted sugar, you start adding butter and more butter... for some of our bakers this proved to be a little bit challenging.... maybe I just "got lucky" and it turned out just FANTASTIC! I am definitely keeping this recipe close by so I can make it again and again!

If you want to know exactly how this cake tasted... remember you can make it too... Get this amazing book! You will not regret it!

Now... some pictures of my cake:

A lot of stuff going on in the background, lol! Here you can see the ganache both in the middle and on the top layer

Here I am ready to completely frost it, the crumbs have been sealed with a thin layer of white frosting


 I hope you will take some time to check out our Facebook Page and our Blogroll so you can see how the rest of the Cake Slice Bakers did as they reveal their cakes!

© Paloma K.

Monday, May 20, 2013

The Pink Cake

Hello everybody, here I am again, with my monthly post! I feel weird to not be as active blogging here but I hope to be able to "get back at it" soon! Not much is going on here, we still have ONE car only, I mentioned 1 of our cars got stolen in my last post, we don't see the possibility of buying another car anytime soon... My 2 yr. old is potty trained! It took me a day! but I shouldn't say it took "ME" I should say that with God's help and with her good attitude this was done quickly! She only had 1 real day of being trained, three days ago, after that she hasn't had any accidents EVEN AT NIGHT! It's amazing that she just "GOT IT" she even wakes up in the middle of the night and lets me know she needs to go potty! What a big girl! It's a little bittersweet I must admit, as I see her grow up so quickly makes me realize I no longer have a "baby" ... But let's not talk more about potty training, especially because we're about to start talking about CAKE!... it's time to reveal the "cake of the month" ... as you know I bake with

The Cake Slice

 Which by the way, we're now on Facebook too! LIKE us here. Well, we, The Cake Slice Bakers, have to bake 1 different cake each month, as you may or many not know, this year we're baking from the book Vintage Cakes by Julie Richardson, and it's been awesome! None of the cakes has disappointed, pretty much everyone has enjoyed each of the cakes so far and that makes me very happy! For May the Cake that won the "poll" was "The Pink Cake" which is a triple layered chocolate cake with a Raspberry Buttercream... I voted for this cake, and the cakes that I vote for usually never win LOL! so I was thrilled to try this one! I must say I was tempted to change the raspberries for strawberries because I am not that big of a fan for raspberries... but I usually like to adhere to the recipe just as it is, even when it calls for ingredients I would not normally use because I see it as an opportunity to try things that might not be my favorite or that I am not so "sure" of... and sometimes I get great results (not always) but I am happy to say that I am definitely happy it worked this time!

The intense color of the raspberries gave the frosting its beautiful pink (and totally natural) color and delicious fragrance! Plus the fact that the raspberries are pureed and strained to remove the seeds "did the trick" and made them "the special ingredient" of this cake! giving it a slight tart freshness that went great with the deep chocolate flavor of the cake.


I went for something simple and decided to make 2 9" layers instead of 3 8"
 I thought this cake would be perfect to have for hubby's birthday... I know it looks a lot like a very girly cake but trust me... any man that is not afraid to have "The Pink Cake" for his birthday will really enjoy it!

I used fresh raspberries for decoration

My husband wasn't sure if he'd like it or not, he's not a fan of raspberries either and he's just happy to have "chocolate on chocolate" kind of desserts... but he trusted me and he was actually shocked by the results, when he had the first bite he actually dropped his hands on the table in actual disbelief, his jaw dropped as well and he just managed to say "this is awesome"

he enjoyed it so much!
Dear friends of ours enjoyed the cake with us, they liked it very much as well.

Our friends Venessa and Bill were happy to enjoy this cake with us!

I am so happy with this cake, it will definitely be one of those "go to" recipes, plus it's pretty simple to make.

It's great that hubby's birthday is in May because I got to have a slice for Mother's Day as well!
If you would like the recipe for this cake, I encourage you to get this book! Really do! You will not regret it! If you love good cakes this is a must have!


© Paloma K.

Monday, April 22, 2013

Better late than never - Almond Streamline Cake with Lemon Custard

Hello everybody! Yes... I am back! At least I am faithful to post something once a month! Don't you think? Everything here is going well, I am running and preparing for my first 5k which will be on Saturday, the girls are growing, hubby's work is good.... oh wait... well... his car got stolen last week... but .... that's another story! Let's focus on our blessings! :D

So... today... I am going to share with you about "April's Cake" ... as you know... I am part of The Cake Slice Bakers  (find us on Facebook here) and I should've posted about our latest cake on the 20th... so I am a little late but here I am and that's what matters...

This month... the "winner cake" was an "Almond Streamliner Cake with Lemon Custard" from the Vintage Cakes Book by Julie Richardson, it is such a great book and all the recipes have worked for me so far! I didn't vote for this cake because hubby doesn't really love "lemony desserts" so I was actually a little "bummed" when this cake was chosen... I think the same thing happened last month... LOL! But we're a team so I still joined the group and baked it... I usually try to share my cake with friends... I just invite everyone who wants some cake to come to my house for cake and coffee (an open house kind of thing) and they come, children and everything for some good conversation and a sweet treat! I hadn't done this since last year because of Holidays... but once Easter was done I knew it was time to re-start my tradition.... And like usual I had a great turn out!

I decided to also make sugar cookies, brownies and chocolate cake to share with kids... and had the greatest time with wonderful, wonderful people!

This cake calls for Almond Paste which I had never used and I am so happy to have discovered this ingredient! Some of the ladies from our group even made their own paste, I just bought it but I will make sure I make my own next time I bake something with it! (There'll be definitely a next time) ... I must say that my almond paste gave the cake a delicious fragrance and just a subtle hint of "Amaretto flavor" in the background... it was very good! Everyone seemed to enjoy it (I hope they weren't just being nice) and most of the Cake Slice Bakers have agreed this cake is a keeper... My husband (as expected) didn't like it at all... but again... that's something I knew would happen because of the lemon custard (that man only wants chocolate! LOL!)

So... here we go with some pictures (If you want the recipe for this cake visit: my friend Anne and her blog "From My Sweet Heart"


 © Paloma K.

Wednesday, March 20, 2013

A delicious time of the month

Today is March 20th, and every 20th of every month I get to talk to you about the cake we, The Cake Slice bakers, made...  by the way... "The Cake Slice Bakers" now has a Facebook Page make sure you visit and like it! It will be a fun place to talk about cakes and all kinds of yummy desserts! Well... anyway... this month, the cake that was chosen was a Honey Bee Cake... and I wasn't too excited, to be honest... I am not a fan of "honey flavor" ... I do love honey... with lime... when I am sick... but for dessert? Not so much! Hubby is not a fan either... so I wasn't thrilled when this cake won the poll! Being a member of a group doesn't mean you're always going to get your way... but it means supporting the group and its decisions... and I am always up for experimenting with flavors, even those that I might not be so sure about...

Well.... I invited a friend over to my house, we were going to do a Bible Study but the people from my Bible Study ended up not being able to come, so it would be just my friend and I ... I thought it would be the best opportunity to make this cake... you know... and have a slice with good company and good conversation... I have another friend who I would've loved having over for cake and coffee, but my other friend and I are trying to lose some weight so I wouldn't put her in the way of temptation... I made my cake and it was SUPER easy and fast to make, not many steps, not many pans, it was just easy and quick....just like I like it...  and guess what? It was DELICIOUS! I chose "Pure Orange Blossoms Honey" and the delicate flavor and texture of the cake with the delicious almonds and honey glaze on top were just excellent for our "brunch" kind of time... ah! I so wish hubby had loved it as much as I did... he did have a slice and said it was good but didn't really love it... he just TRULY doesn't enjoy honey flavor... I'd say "this is the cake" ... it's from the "Vintage Cakes" book by Julie Richardson and it's in the "Everyday Cakes" section.. well... it sure is the perfect cake for "any day" at "any time" whether it's dessert or brunch... it's lovely and fragrant! and it's just excellent for a Spring Day! I am tempted to make it again for Easter, my mom and sister will be visiting with us!

I also made a brown sugar whipped cream to go with it, the recipe for the cream I took from the previous book we used in the Cake Slice Group, "The Cake Book" by Tish Boyle. and it was the perfect accompaniment.

Here are the pics of my cake:


For the recipe... well... I will just encourage you to get this book! I know! I know... Now you want it, right? Well... you truly must have it... you can get it: here, just know that I am not earning any commissions from the sales of this book, LOL! This is just an honest, personal recommendation.

If you want to see what the rest of the bakers from the Cake Slice are baking and what their cakes look like... visit:


The Cake Slice
© Paloma K.

Wednesday, February 20, 2013

Red Velvet Cake with Mascarpone Cream Cheese Frosting

Hello everybody! As you have probably noticed I haven't been blogging as I used to and even the "Coffee Friday" tradition has been stopped, I am taking care of business in my home, baking tons and just enjoying my girls and my new roles in church as a translator and other things that I am honored to be involved with... So right now my blog is suffering and even when I miss it I am ok with it because I know life is like that and I am busy living it! So much blessings to enjoy!

A tradition that will remain is my CAKE OF THE MONTH... I am part of The Cake Slice Bakers and we choose one cake each month and then reveal our cake on the 20th in our blogs! For February we chose "Red Velvet Cake with Mascarpone Cream Cheese Frosting" and according to my husband it was a great choice!

The original recipe makes a two layered 9" round cake but I decided to go for cupcakes instead and made them for Valentine's Day, cupcakes are not only "cute" but also easy to share with friends or in this case with people at hubby's work.

Here are my cupcakes:


 I didn't take many pictures of the process or even an individual cupcake, it's been a few rough weeks here in our house and I guess I wasn't very inspired... but at least I took a picture of a cupcake before hubby finished it...


I guess what doesn't help is the fact that I can't really eat cake, so I only enjoyed a small bite of one... they were good but hubby actually said they were awesome! So... I highly recommend these... here is the recipe:

Red Velvet Cake with Mascarpone Cream Cheese Frosting
Makes one 9" double layered round cake or 24 standard cupcakes
Slightly adapted from: Vintage Cakes by Julie Richardson

Ingredients: (All ingredients should be at room temperature unless it's indicated otherwise)

For the cake
  • 2 1/2 cups sifted cake flour (important to sift before measuring)
  • 1/2 cup lightly packed unsweetened Dutch Processed Cocoa
  • 2 tsp. baking powder
  • 1 tsp. salt
  • 3/4 cup safflower oil
  • 2 tsp. vanilla extract
  • 1/2 tbsp. red gel color
  • 3/4 cup unsalted butter
  • 1 3/4 cup sugar
  • 4 eggs
  • 2 egg yolks
  • 1 cup buttermilk

For the frosting (this frosting recipe makes about 3 cups, enough to fill and top but not completely frost an 8 or 9" layer cake or 24 cupcakes)
  • 8 oz. cream cheese
  • 8 oz. mascarpone cheese (cold)
  • 1/2 cup heavy cream (cold)
  • 1/3 cup sugar
  • 1 tbsp. pure vanilla extract
Directions:
  • Center an oven rack and preheat oven at 350F
  • In a small bowl sift together flour, cocoa, baking powder and salt, whisk until well mixed.
  • In another small bowl combine oil, vanilla and food coloring.
  • In the bowl of a stand mixer (using paddle attachment) cream butter and sugar together on med-high speed until fluffy about 5 minutes. Scrape sides of the bowl as necessary.
  • With mixer on low speed drizzle the oil mixture into the batter until well combined.
  • Turn the mixer gradually up to med-high speed and beat until fluffy again. 
  • Blend in the eggs and egg yolks one at a timeadding the next one as soon as the previous one has disappeared into the batter, no longer! It is important to not overmix.
  • With the mixture on low speed, add the flour mixture in three parts, alternating with the buttermilk in two parts, beginning and ending with the flour.
  • After each addition, mix until just barely blended and stop and scrape the bowl. Stop the mixer before the last of the flour has been incorporated and complete the blending by hand with a rubber spatula to ensure you do not overbeat the batter.
  • Divide the batter evenly into the prepared pans (or muffin tins). Rap the pans firmly on the counter to release any  air bubbles.
  • Place the pans in the middle of the oven and bake until the centers of the cake spring back when lightly touched (about 28-30 mins or about 20 minutes if baking cupcakes). Cool n rack for 30 mins. before removing from pans. Be careful when removing from the pans, as they are fragile and they could crack. Leave the parchment paper on until you assemble the cake. 
Make frosting:
  • Using a stand mixer with paddle attachment beat the cream cheese until it's smooth and uniform in texture. Add mascarpone, cream and sugar. 
  • Beat on low speed until combined, scraping the sides of the bowl well to ensure all ingredients are incorporated. 
  • Kick the mixer up to high speed and blend the frosting for about 1 minute or until it looks creamy and thick. Turn down to low speed, add vanilla and mix just until blended.
(This frosting keeps in the fridge for up to 5 days)

Assemble the Cake:
Once the cake has completely cooled off place one of the layers, top side up on a serving plate. Using a metal spatula spread half of the frosting over the top of the cake, spreadint it slightly over the edge of the cake. Place the next layer of the cake, top side up again, on top of the frosted layer. Spread the remainder of the frosting over the top of the cake.

This cake keeps well in an airtight container in the refrigerator for up to 2 days, allow at least 1 hour for the cake to come to room temperature before serving.

Enjoy!

© Paloma K.

Sunday, January 20, 2013

The Cake Slice and The Classic Cake

Hello everybody! Sorry I haven't been around as much... I am doing good stuff though! Being a mom and enjoying the terrible two's -OY!- but it's all a blessing, even those little things that now frustrate me... I know it's just a stage and this too shall pass and I might soon look back and feel like it passed way too quickly!

So... as many of you know I belong to a Secret Online Baking Group called The Cake Slice, we are a group of ladies who love baking and we choose a different book each year to bake from, right now we are baking from "Vintage Cakes" by Julie Richardson and it's been such a joy to bake from this book!

For January, two of the 4 cakes to choose from were tied at the end... so we had the choice to bake either of them... I chose "The Classic" and I am glad I did... I actually talked to a friend (Laurie) about it and about the fact that I can't really eat much cake anyway... and she had the great idea to use it for her hubby's birthday! They're all great friends so we made it a "date" and we all had lunch at her house yesterday with her family to enjoy her food and my cake... her husband really enjoyed it and my husband was almost like he was in heaven... he couldn't stop saying how much he loved it!

I am not sharing the recipe this time... but I am sharing with you "the process" of making it... I hope it's still fun!

My first two layers actually sunk! I was distracted and used baking soda instead of baking powder!
Chocolate ganache in the making! Semisweet chocolate + heavy whipping cream + dark brown sugar = awesomeness!
Second batch of cake layers were great! The recipe asked to make 4 layers out of the two but I used bigger round pans and preferred to have 2 thick layers than 4 thin ones.
This would've been the final product but I thought it looked too simple and dark....

So I gave it an extra touch with melting some white chocolate with butter and heavy cream to decorate the top.

Here's the birthday boy waiting for his wife to give him a slice!
Now... this is a cake slice! although it was supposed to be "yellow cake" and I found it "whiter than yellow" Delicious though!

Success!

© Paloma K.

Thursday, December 20, 2012

Mississippi Mud Cupcakes with Marshmallow Frosting!

Hello everybody! As you know (I hope) I am part of an amazing baking group... The Cake Slice !

This time we all voted, like we do every month, and the "winner" was:

Mississippi Mud Cupcakes with Marshmallow Frosting

And AH! You have to trust me... They did not disappoint! They were MUDDY and good! Well... not muddy... not gooey but just so chocolatey moist! And the marshmallow frosting was just perfectly delicious and went really well with the cupcakes! I decided to half my recipe, 24 cupcakes would've been too many! But the 12 cupcakes I made were certainly enjoyed!

The Marshmallow Frosting required lots of precision and good timing! There were no "marshmallows" involved... you had to make your own! ... it was made with thoroughly beaten egg whites and candy (melted sugar until it reached 242 F) and then mix it all together at the exact time when the caramel reached the temperature (I had NO THERMOMETER!!!) and the egg whites were just right and stiff! I was nervous about it but ... everything went well! I am debating if I should post the recipe as well... I think I might but I am falling asleep and just exhausted from all the baking I've been doing, just today I baked about 300 cookies and 24 empanadas! but I didn't want to wait any longer because we're supposed to reveal our cakes on the 20th of each month and I didn't want to be late!

So... it was fun and totally worth baking these cupcakes! The recipe is a really great one from a book I've come to love: Vintage Cakes by Julie Richardson... If you don't own it yet and you love traditional cakes, this is a must have!

Here are the pics (horrible pictures by the way) of my cupcakes... And yes... I am asking Santa for a new camera! LOL! Santa might be late though!

Perfect and stiff egg whites, just right!

This is the marshmallow frosting, had to be piped immediately!

My finished cupcakes!

Merry Christmas!

© Paloma K.