Printfriendly

Print Friendly and PDF

Thursday, May 31, 2012

Old friends and Lighter Chicken and Biscuits

Hello everybody! I am sooo happy! It's almost Friday! If you know me then you know I am not someone who complains about Mondays and is only happy when it's Friday...  I actually love Mondays! It feels to me like they are always a good opportunity to do things differently, etc... but... this time I am super excited because tomorrow we'll have friends -who live far away- coming over! ... they've been my friends for so long! They are a couple (Tere and Daniel) ... I've known her since I was 12 and I know him since I was I think 15 or 16 ... it turns out that they have always been like a sister and a brother to me and then they got married! How cool is that? To have your best friends get married and you can keep talking and hanging out and just sharing the same memories, etc... I actually went with him to the jewelry when he was looking for an engagement ring for her about 16 years ago! WOW! then we continued to hang out in church and later on at work, Daniel and I worked at the same company together and when I lived the hardest times in my life they both were there for me, just like family!... and I think I am going to be grateful with them FOREVER! They now have 3 kids and I am sure you can imagine how THRILLED I am to think of our children playing together! Oh! Memories... sweet memories! So... they'll be spending the weekend with us!

.... and now... the recipe:

As good as sweet memories "  Lighter Chicken and Biscuits"
(Slightly adapted from Martha Stewart's recipes)


Inspired by southern comfort food. It's not exactly "low calorie" but it is still a healthier version.

Today is SIMPLE LIVES THURSDAY ... if you want to know more about it visit Diana's blog:  "A Little Bit of Spain in Iowa" go visit her and join her on this project! It is very cool! It's all about tips/recipes, etc... on living a "Simple (and wholesome) life" ... I hope you like it.

Serves 4

Ingredients

  • 1/3 cup whole-wheat flour, spooned and leveled
  • 1/3 cup plus 2 tablespoons all-purpose flour, spooned and leveled
  • 1 teaspoon baking powder
  • Coarse salt and ground pepper
  • 1 large egg white
  • 3 tablespoons plus 2 teaspoons vegetable oil, such as safflower
  • 1 cup low-fat (1 percent) milk -You can use whole milk if you prefer-
  • 5 carrots, thinly sliced
  • 5 celery stalks, thinly sliced
  • 1 box (10 ounces) frozen pearl onions, thawed
  • 1/4 teaspoon dried thyme
  • 2 pounds boneless, skinless chicken breasts, cut into 1-inch pieces

Directions

  1. Preheat oven to 450 degrees. In a medium bowl, whisk together whole-wheat flour, 1/3 cup all-purpose flour, baking powder, and 1/4 teaspoon salt; set aside.
  2. In a small bowl, whisk together egg white, 3 tablespoons oil, and 1/4 cup milk; add to flour mixture, and stir until moistened. Drop four 1/4-cup scoops of dough onto a baking sheet, at least 2 inches apart. Bake until golden, 12 to 14 minutes.
  3. Meanwhile, in a 5-quart Dutch oven or large heavy pot, heat remaining 2 teaspoons oil over medium-high. Add carrots, celery, and onions; season with salt and pepper. Cook, stirring frequently, until vegetables are tender, 7 to 10 minutes.
  4. Sprinkle vegetables with remaining 2 tablespoons all-purpose flour; stir in remaining 3/4 cup milk, 1/2 cup water, and thyme. Simmer until liquid is thickened, 2 to 3 minutes, stirring occasionally, (add more liquid if too thick). Add chicken; simmer until cooked through, 3 to 5 minutes. Serve chicken stew with biscuits.

So... to good friends! ... ENJOY!

 © Paloma K

Tuesday, May 29, 2012

Tuesday of Quotes and Blueberry muffins

Well...today is Tuesday! And I am supposed to share a famous quote, inspirational thought or words of wisdom on Tuesdays but I have so much to share that I'll share the quote and then go ahead and write a little about Summer and share a great blueberry muffin recipe!

So... here is the "Quote of the Day" ... thinking of Summer!

"A life without love is like a year without summer. " ~Swedish Proverb


It's a beautiful day outside! It's super hot but that's ok if there is a cool pool or some splash pad where the kids can get all their energy out! It's been a great summer so far! I know it's just beginning and I also know it's more than likely I will soon complain for the hot weather, etc... but I hope I can have a better attitude this year and just enjoy it all like my oldest girl in this picture:


Saturday we had an awesome morning with friends! We went BLUEBERRY picking! Let me say that I've never been a big fan of blueberries and/or blueberry desserts, for some reason I've never found them to be that good, I've honestly tried to like them and bought them sometimes at the store but nah! they would usually end up in the garbage, this time I was excited about going blueberry picking just for the fun of it! In Wisconsin I used to go apple picking and I miss it so I thought it would be fun to do something like that here in the hot State of Texas! when my friend invited me to go with her I was ecstatic! We got there at around 9:30 a.m. and there were lines of people LEAVING already! and many more that were just arriving like us! Everybody had buckets to collect the blueberries and big bags FILLED with them! I kept wondering how the blueberries don't get all squished in there being as fragile as they are... but anyway... I picked a little and my girls did too... then had to stop because it was way too hot and my 17mo. needed a break from the heat, still had a lot of fun and got to enjoy some berry picking!


 Then when we finally got home my friend shared some of her berries with me, I didn't really pick any for us because I didn't know what I would make, since nobody here likes blueberries either (although I was surprised when I tasted the blueberries we were picking and they were AMAZING! Soooo different from the ones we buy at the store!) so I was happy she shared some so I would try to make something with them... and... this is what I made:

Blueberry Muffins
Original Recipe "To Die For Blueberry Muffins from Allrecipes.com"


Ingredients

  • 1 1/2 cups all-purpose flour
  • 3/4 cup white sugar
  • 1/2 teaspoon salt
  • 2 teaspoons baking powder
  • 1/3 cup vegetable oil (I use safflower)
  • 1 egg
  • 1/3 cup milk
  • 1 cup fresh blueberries
  • 1/2 cup white sugar
  • 1/3 cup all-purpose flour
  • 1/4 cup butter, cubed
  • 1 1/2 teaspoons ground cinnamon

Directions

  1. Preheat oven to 400 degrees F (200 degrees C). Grease muffin cups or line with muffin liners.
  2. Combine 1 1/2 cups flour, 3/4 cup sugar, salt and baking powder. Place vegetable oil into a 1 cup measuring cup; add the egg and enough milk to fill the cup. Mix this with flour mixture. Fold in blueberries. Fill muffin cups almost to the top, and sprinkle with crumb topping mixture.
  3. To Make Crumb Topping: Mix together 1/2 cup sugar, 1/3 cup flour, 1/4 cup butter, and 1 1/2 teaspoons cinnamon. Mix with fork, and sprinkle over muffins before baking.
  4. Bake for 20 to 25 minutes in the preheated oven, or until done.

These muffins were AMAZINGLY GOOD! Hubby wanted to have 3!!! right away! I only let him have two! I was afraid he would get a stomachache! LOL! ... He loved them so so so much! and my littlest one loved them too! I was a big fan too but I don't eat cake/cupcakes right now so... I had to pass! Trust me ... you'll like them though!

© Paloma K.

Monday, May 28, 2012

Memorial Day and a Winner!

Hello friends! I hope you are all (if you live in the USA) enjoying a nice day off with your family! I hope you eat good and rela... But I also hope you use this day to think of those who have sacrificed their lives and have been willing to fight to defend and protect our freedoms that sometimes we just take for granted! So... if you know someone who is fighting, who fought or who is related to one of those brave people... please make sure you show your gratitude somehow! I know I am thankful to all those people... and today I want to honor those two people in my life who went to war and who I am blessed to know and call family!

Grandpa Huebschen 
Poor grandpa! I couldn't help but give him big HUGS!

Blessed to have such a great grandpa (Hubby's grandpa)

Wonderful man!
Uncle John 
Holding my oldest daughter when she was a baby

With my girl again (impossible to take a pic of him where he is not surrounded by kids)

 Thank you for service you did for your country! Love you so much!!!!

---------------------------

and now... the Winner of the Giveaway!

[[[drumroll]]] 

Congratulations to Ginny Marie from Lemon Drop Pie , She'll be receiving the $25.00 USD Starbucks Card! 

Stay tuned for more recipes, posts, book/movie reviews, giveaways and life stuff  here... in your Coffee Shop!

 © Paloma K

Friday, May 25, 2012

Strawberry Tart

Hello friends! It is Friday! finally! The weekend is here and it's going to be a long weekend for most people in the USA! So... enjoy! But please, please If you drink (you don't need to though) but if you do... please, don't drive! I beg you!

Anyway... lighter topic instead of the drinking one because I get rather passionate about that one... So, first of all... did you enter my giveaway? It's almost over but you still have time so to enter just click here. Now... to our topic! ... Just the day before yesterday hubby told me he needed a CAKE for Friday for a meeting in his job! (I mean... he told me this like at 9 p.m. on Wednesday), and the cake he wanted me to make was my famous "Chocoflan Cake" which is delicious and not really that hard to make but it just involves some ingredients I didn't have at hand and TIME for baking (it bakes in a water bath  for two hours) but I thought I would just go to the store on Thursday, get the ingredients and then make and bake it at night when hubby came from work so it would cool completely and then be refrigerated... But then... the sun came out and it was a beautiful day! It was windy and really warm outside! It just felt like the perfect day to hit the pool! We had been wanting to enjoy a day of swimming but for one thing or another (girls being sick and stuff like that) we hadn't been able to, so yesterday I just took my girls to the pool and even had a friend and her son join us! It was a lot of fun! We splashed and enjoyed the water for almost 3 straight hours! I didn't even realize I was getting sunburned! But it was just sooo great, after that, my girls (and I) were hungry so we went to Chick-Fil-A for dinner....

We had a great time and my baby girl was ready to go to bed pretty early at night (awesome!) but I still had to make a "cake" for hubby's work... Good thing the pool and sunny day inspired me to make something different (and much faster to prepare) .... I knew it HAD TO HAVE strawberries... then I found the perfect recipe...

Strawberry Tart
Slightly Adapted from Martha Stewart Recipes


Ingredients

  • For the Crust

    • 1 1/4 cups all-purpose flour (spooned and leveled), plus more for handling dough
    • 1/2 cup (1 stick) cold unsalted butter, cut into small pieces
    • 1/3 cup sugar
    • 1/4 teaspoon salt
  • For the Filling

    • 1 bar and 1/2 (12 ounces) cream cheese, softened
    • 1/4 cup + 1 tbsp. sugar
    •  2 pounds strawberries, hulled and halved
    • 1/4 cup seedless raspberry jelly

Directions

  1. Make the crust: Preheat oven to 350 degrees. In a food processor, blend flour, butter, 1/3 cup sugar, and salt until moist crumbs form (this may take up to 1 minute). Transfer dough to a 9-inch round tart pan with a removable bottom.
  2. With floured fingers, press dough evenly into pan and up sides. Dip a dry-measuring cup in flour, and use it to press dough firmly into bottom and against sides of pan. Freeze crust until firm, 10 to 15 minutes.
  3. Using a fork, prick crust all over. Bake until golden, 15 to 20 minutes, pressing down gently once or twice with a spoon during baking if crust puffs up. Cool completely in pan.
  4. Make the filling: In a medium bowl, mix cream cheese and remaining 1/4 cup + 1 tbsp. sugar until smooth; spread mixture evenly in bottom of baked crust (still in tart pan).
  5. Starting from outside edge, arrange strawberry halves, stemmed side down, on cream cheese.
  6. In a small saucepan, heat jelly on medium-low until liquefied. Gently brush strawberries with jelly; let set at least 20 minutes. Chill in pan at least 1 hour (and up to 6 hours); remove from pan just before serving. (You can use a pizza cutter to slice) 
Hubby wasn't sure about this "Strawberry Tart" he is not fond of cheesecakes (so he was afraid it would be like that) plus he doesn't really care for "fruity desserts" but... I actually had to share this recipe because he JUST called me from work saying this was absolutely amazing! I was very happy everyone enjoyed it! It was easy to make and delicious! I hope you try it too! (Please let me know if you do!)


 I only had 1 pound of Strawberries, that's why there is space between each strawberry but if you do have the 2 pounds just go ahead and place them all right next to each other and it will also look even prettier!  Enjoy your weekend!

 © Paloma K.

Thursday, May 24, 2012

A Birthday Pie!

Well... The other day,Venessa, a friend from church (and on FB), was wondering if I could make a pie for her son's 14th birthday... It turns out that her son Brandon, wanted a HOMEMADE Pie instead of a Cake for his special day! so she wanted to buy the pie from me. Don't you think that's a SMART BOY!? Many kids don't even appreciate a good homemade pie (or cake) over a store-bought cake or treat! I was so honored to be chosen as the "one" to make the pie for such a special occasion!  I was even a little nervous because I don't really bake for other people (outside of my family) and I never charge if I do... I didn't even know how much I would charge! They are friends! And homemade stuff can never compete with big stores in price! You buy your own apples, and all ingredients for crust, the pan, all the dishes to wash (soap, water, etc), your time (you make 1 pie in an hour when a store makes 30 at least!), I use tons of paper towel when cooking... electricity, etc... I couldn't even give her a number! I really tried... You know? I started making numbers: Apples $3.00, butter $1.50, disposable pan for pie 1.00 but then what... 2 cups of flour, sugar, shortening, 1 hour in the oven, etc... I wouldn't even really know. But just like a homemade pie can't compete with a store-bought one in price... the store-bought one can't compete with a homemade one when it comes to flavor, detail and just the main ingredient: LOVE! So I left the price up to her ... I wanted her to be the one "anxious" about it and not me! LOL! Her and her husband were very generous as I know it would've been much easier (and cheaper) for them to just go to the store! Plus just the fact that they let me "in" in their homes through my pie and deemed my baked goods worth it of such honor was for me.

I asked her to please take pictures of the birthday boy with his birthday pie! and asked her if she would let me blog about it to share with all of you and she happily agreed... so... I wanted to share with you:


Happy Birthday Brandon!

 © Paloma King

Wednesday, May 23, 2012

Coffee with Real ONLINE friends

Who said you can't really make friends online? Who said you can't have a real connection with someone you have never seen in person? I know that wasn't me! I wake up every day with someone I first met online! We pretty much got married on the  7th time we saw each other! You might think I am crazy but I think that many times (not in all cases! So... KIDS BE CAREFUL) but I think you can really get to know someone even better when you are not distracted by appearances (good or bad) and you can even talk in a deeper way (many times) when you are just opening your heart without seeing the reactions of the people's face and then "changing what you were originally going to say" because you realized they "didn't like it very much" just by their body language...

I could go on and on right now about the "safety steps" you need to take to have a real, honest, committed online relationship but that's not today's topic... Today I am just going to say that I'll get to make new friends tomorrow! Through Gevalia's Beanchat! It is very cool! We have fun, talk about lots of stuff, and the hour passes TOO QUICK! I am going to be hosting the BeanChat and there are GIVEAWAYS there too! so you can get to have a great time, meet new people (who also love coffee!) and get some coffee at your door for free! Just from having a good time!

So... If you want to support me and have a good time... I encourage you to go to: Gevalia Coffee FB page LIKE THEM and then Click on BEANCHAT tomorrow Thursday 5/24 at 9 a.m. Central! (you can find the Beanchat Link directly on their page too)  I know you'll have fun!

Don't forget I have another giveaway HERE TOO! It's a 25.00 USD Gift Card.

So... Let's have a great time with GEVALIA! and my great friend Liz ... who is someone else I've come to know and really love... all online!

© Paloma K.

Tuesday, May 22, 2012

Tuesday of Quotes

First of all a reminder! I am giving away a Starbucks 25.00 Gift Card...click here to enter

Now... our post!  I am trying to re-take old traditions! Now that I am back to real blogging and I've been more consistent with posting, etc... I thought I would re-start my Tuesday of Quotes! Where we'll have some famous Quotes, Inspirational Thoughts and Words of Wisdom. So... Here is today's:


"Regret for wasted time is more wasted time". by Mason Cooley.


Good one! Isn't it?

Have a wonderful Tuesday!

© Paloma K

Monday, May 21, 2012

Garlic Lovers' Pot Roast

First of all... did you enter my giveaway? I see that not many have entered yet... So there are lots of opportunities to win! Sometimes I want to give this gift to myself! LOL! ... I am giving away a $25.00 Starbucks Gift Card so click here to enter!

Yesterday I was surfing the web trying to find a "different way" to slow cook the Beef Chuck Roast I bought! I like buying this cut of meat because it is cheaper and you can still make wonderful things with it! I try to be very frugal when cooking and I also try to make healthy things! I know! You see lots of desserts posted here and sugary stuff... but the truth is that even when I love desserts I don't eat them (I used to but not any more.. or not as much as I did... don't take me wrong... I'd LOVE TO! but you can't eat all those delicious treats without your  body paying the price) Hubby, on the other hand, loves all desserts (not so much the fruity ones) and since I enjoy baking he is pretty much in paradise! Plus, he doesn't gain any weight, I envy him so much! I am so happy for him! So he eats as much as he wants! Anyway... here at home, the rest of us (my 2 girls and I) don't really eat much sugar... Natalia loves chocolate, but that's it, and just eats a little bit of chocolate occasionally... Karina, she doesn't eat any sugar or dessert, but they love LOVE vegetables! That's what they see as a "snack" you'll see Natalia asking for celery in the middle of the day! And I am all backwards! I almost have to say "eat your dessert or I won't give you any vegetables!" (LOL! j/k) So... that's pretty much us in this household! I have to be constantly buying vegetables! They just don't last! Even my omelette I eat for breakfast in the morning has green bell peppers, mushrooms, zucchini, onions and sometimes chopped tomato!

So I was looking for a recipe and I came across an idea! I saw Chef Emeril encrusting GARLIC CLOVES in a 3.5 lb. cut of Beef Chuck Roast! I immediately knew I would love it! I thought it was too much garlic (even for my taste) but I decided to give it a try! And Am I happy I did? It was perfect! So I thought I would share MY VERSION of the original recipe by Chef Emeril with you!

See the Encrusted Garlic Cloves? This worked really great!


Garlic Lovers' Pot Roast 

Ingredients

  • 1 (3-pound) boneless beef chuck roast
  • 10  cloves of garlic, peeled and halved lengthwise
  •  About 2 teaspoons coarse salt (I use Kosher)
  • 1 teaspoon freshly ground black pepper
  • 2 tablespoons olive oil
  • 1 chopped white onion
  • 3 peeled and chopped carrots
  • 2-3 stalks of chopped celery
  • 2/3 cup of low sodium chicken stock, I recommend Swanson! If you don't have low sodium chicken stock then use 1/2 Stock 1/2 water.
  • 1 cup of red or white wine (I used white, you don't have to use wine, you can just use more chicken stock but wine really brings it to another level)

Directions

  1. Using the tip of a sharp paring knife, make 20 small evenly spaced slits about 1 1/2 inches deep all over the pot roast. Using your fingers, insert the garlic cloves as deep into the slits as possible. Season both sides of your roast with salt and pepper.
  2. In a Dutch-oven (or big/heavy pot with tight lid), heat oil over high heat. Carefully add meat and sear on all sides until very well browned, 4 to 6 minutes per side. Add onion, carrots, celery, and 2/3 cup chicken stock and wine. Cover and reduce heat to medium-low; cook until roast is very tender, 3 to 3 1/2 hours, turning about 2 to 3 times. Add more water or wine, if desired, as needed so that there is always a little liquid in bottom of Dutch-oven. (If done in the oven, the temperature should be 300 degrees, and the roast should cook for 3 to 3 1/2 hours until tender.)
  3. Transfer meat to a cutting board and let stand 10 minutes. Slice meat (or shred if preferred) and serve drizzled with pan juices.
Serve with a side of mashed potatoes and Enjoy!


© Paloma King

Sunday, May 20, 2012

Delicious and very fresh dessert - The Cake Slice

Hello friends! Thank you all for choosing "The Coffee Shop"! I have been going back to my old posts, re-reading the comments and checking my Subscriptions to try to get in touch again with my old friends who used to make this place such a vibrant, happy spot to gather! "The Coffee Shop" is a place where we can talk about anything! Enjoy good food! but mostly enjoy one another! I am hoping I can soon gain new friendships and re-connect with the old faces that I miss so much! It's been all my fault because I wasn't here consistently due to just the "daily life" but I hope I am here for good now! we'll see, right? We all have "seasons" like that!  Just as a way to say "Thanks for being patient with me" I am hosting a giveaway! I am giving a $25.00 Starbucks Gift Card! I hope you enter! Please check my previous post! Entering is SOOO EASY! You basically just need to follow me here or like me on FB to enter! you can get more entries by blogging about the giveaway... just check it out here . I really appreciate your support!

Today... it is May 20th! And if you  remember I am a member of a wonderful group of ladies who LOVE BAKING as much as I do... check their blogs here: The Cake Slice Bakers

This year we are baking cakes from:  "The Cake Book by Tish Boyle"  I've loved that book and I've really enjoyed everything we've baked so far. This month was the turn for:

Delicious and beautiful!

Individual Meringue Cups with Lime Cream and Fresh Berries

This delicious dessert was just heavenly! So light! So fresh! You basically have to make some meringue cups, then lime cream (like a curd) and then you fill your cups and top it all with fresh berries (I only used strawberries and blackberries) ... I loved this! I am definitely going to make it again!

Here is the recipe: (Makes 6 Individual Meringues)
Ingredients:

Meringue Cups:
4 Large egg whites at room temp.
Pinch of salt
1/4 tsp. cream of tartar
1 cup (7 oz) superfine sugar


Lime Cream:
4 large egg yolks
1/2 cup granulated sugar
6 tbsp. freshly squeezed lime juice
4 tbsp. unsalted butter (cut into tablespoons)
1 tsp. finely grated lime zest
3/4 cup heavy cream

Fruit Topping
2 cups mixed fresh berries (raspberries, sliced strawberries, red currants, blueberries)

Confectioner's sugar for dusting.

Elaboration:

Make the Meringues:
  1. Preheat oven at 225F. Trace six 3 1/2" circles onto a sheet of parchment paper. Turn parchment paper upside down and place it on the baking sheet.
  2. In the bowl of an electric mixer, using whisk attachment, beat the egg whites at med. speed until foamy Add salt and cream of tartar and beat at med.-high speed until soft peaks begin to form. Gradually add the sugar, about 1 tbsp. at a time, then increase speed to high and beat the whites until stiff peaks form.
  3. Scrape meringue into a large (18") pastry bag fitted with a medium plain tip. Starting in the center of each circle, pipe a spiral of meringue in toward the edge, filling the circle completely. Pipe a ring of meringue around the edge of each circle. Pipe another ring of meringue on top of the first to form cups.
  4. Bake meringues for 2 hours or until they are very lightly colored and dry to the touch. Let them cool completely (I think I baked them for about 1 hour only). 
 Make the Lime Cream
  1. Set a fine mesh over a medium bowl and set aside. In a medium heavy saucepan (making sure it's perfectly clean, stainless steel and has no traces of grease in it) whisk together the egg yolks and sugar until blended. Stir in the lime juice and butter and cook over medium heat, whisking constantly until the mixture turns opaque and thickens enough to leave a path on the back of a wooden spoon when you draw your finger across it. Remove the pan from the heat and immediately strain the custard through the sieve pressing it through with a rubber spatula. Stir in the lime zest. Set the mixture aside while you whip the cream or if you are not ready to serve the meringues, refrigerate the mixture, covered until ready to use.
  2. Shortly before serving, in the bowl of an electric mixer, using the whisk attachment, beat the heavy cream at high speed until medium-firm peaks form. Place the bowl of whipped cream in refrigerator.
  3. If the lime mixture has not been refrigerated, set the bowl containing the lime mixture in a large bowl filled about one third of the way with ice water (be careful that the water doesn't splash into lime mixture). Stir mixture frequently until is slightly cooler than room temp. (about 10 minutes)
  4. Fold a large spoonful of the whipped cream into the lime base to lighten it. Gently fold in the remaining cream.
  5. Spoon the lime cream into the meringue cups, dividing it evenly. Top each meringue with mixed berries, then dust lightly with confectioners' sugar and serve.
STORE the unfilled meringue shells in an airtight container in a cool dry place for up to 5 days, once filled they should be served immediately.


I hope you try this recipe! I think it would be perfect for a 4th of July celebration! If you try it let me know how you liked it! and please don't forget to enter the giveaway.

Enjoy!


© Paloma K.

Thursday, May 17, 2012

Memorial Day GIVEAWAY!!!


So... I am due for a giveaway! I know! So... this time I am giving away a $25.00 Value Starbucks Card for you to enjoy a nice treat at Starbucks! How can you enter this giveaway? You just need to:

  • 1 Entry: Follow us publicly here on "The Coffee Shop" blog.
  • 1 Entry: Like Us on Facebook  "The Coffee Shop" on FB
  • 1 Entry: Follow us on Twitter @love_4_coffee and tweet about this giveaway using #Ilovecoffeegiveaway
  • 1 Entry: Tell me what kind of recipes you would like to see posted here and topics you'd like me to discuss too.
  • 2 Entries: Write a Public post about this giveaway on your blog (or on Facebook) saying why you'd like to win the Starbucks gift card.
  • 3 Entries: Blog about your 3 Favorite Recipes from "The Coffee Shop" on your blog, with links to those recipes.
Applicable only to USA and Canada residents. If you did one or all of the above please leave a comment here specifying exactly what you did (only one comment per person please) and leaving a link to the blog post where you mention about our giveaway if you did so.


This Giveaway starts now! May 17 2012 and ends on May 27th 9:00 p.m. Central. Each entry will be assigned a number and the winner will be randomly selected with True Random Number Generator and announced on Memorial Day May 28th at 2:00 p.m. here on "The Coffee Shop" blog, on Facebook and via Twitter. The winner will have 48 hours to claim the prize or an alternate winner will be selected.

Thanks for choosing The Coffee Shop!


Enjoy!

© Paloma King

Wednesday, May 16, 2012

A great Mexican feast!

Hello everybody! If you follow my page on Facebook The Coffee Shop on FB then you already know I had the big privilege to be invited to cook for a group of friends from church, actually they are all ladies, wives from the pastors in church, I didn't know most of them, except for the hostess, my friend Gay, she is the Senior Pastor's wife and she led a Bible Study I was part of during spring and the Mission's Pastor who I had basically just been in a meeting with once but didn't really talk to her so I pretty much didn't know anybody and I was a little nervous about cooking for other people... Leaving my nervousness aside I started getting ready on Saturday, shopping for most of the ingredients I would need, I got poblano peppers, chicken, corn, butter, pork meat, achiote (annatto seed paste), vinegar and some other things like that... I already knew what I would make! Then, hubby gave me the wonderful news that he would be able to stay home on Tuesday (yesterday) so it was great having him around because he helped me keep our girls busy and also keep the kitchen organized so I wouldn't have to lose focus from all the cooking.

Cooking it all was a lot of fun, I started at 9 in the morning with the cake, which had to bake for 2 hours because it was also submerged in a water-bath,

This is how the cake looked right out of the oven
While the Cake was baking the pork meat was being marinaded in mix of spices, apple cider vinegar, orange/lime juice and annatto seed paste, once the cake came out of the oven it was the turn for the meat to bake... after bundling it all up in Banana Leaves, just like they do in Yucatan, Mexico!

Baking dish lined with banana leaves

Marinaded meat ready to be baked

After baking for 4 hours


While the pork was baking I cooked and shredded the Chicken for my "Pollo con Rajas Poblanas"

Time flew, and it was time for the poblano peppers to roast! 


Once the peppers were roasted it was time for me to get ready, I took a shower and got dressed, it was getting a little late, I still had to "finish some details" at the Hostess house.

When I came to her house, I was welcomed with a big warm smile! I immediately felt home, I was told where I could find the cooking utensils and where I could chop my ingredients that needed chopping. I made a simple white rice there, peeled the roasted peppers and put the "Pollo con Rajas" (chicken with Poblano Slices) together and also blanched the sliced red onion to later dress it with some vinegar, oregano flakes and salt to garnish the Cochinita Pibil . The guests started arriving and I couldn't help but smile when every single lady walking through the door said: "It smells great! It smells wonderful!" I loved it!


Everybody was so wonderful! I think once again I talked too much! I talk when I am nervous (and when I am calm too! LOL!) so there I was yapping the whole time! I just felt like I knew them all and it was interesting to get to know them and what their husbands do in church. 

They all raved about the food! I was a little concerned because I know the flavors are very unique and different but they all ate their food and made comments about how much they liked it... then it was turn for the cake and everybody enjoyed it too! Even I had a thin slice of it (oh yes! I ate with them! and then indulged with a little bit of cake!) who can say no to "Chocoflan Cake"?


It was just a wonderful evening! I must give credit to my wonderful hubby who not only helped me during the day but also watched the girls at home so I could do this and have fun too! Thanks Josh! you are just AWESOME!

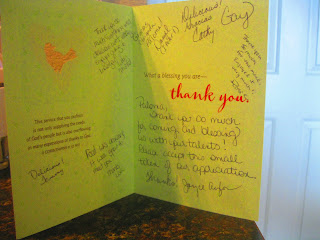
To end it all even better I received a beautiful card that made me feel sooo special and appreciated! I wasn't expecting that at all! Each of the ladies signed the card... that was so nice of them to do! Everything just went even better than I anticipated (and I anticipated for it to go GREAT!)


And I even got an order for a cake (another Chocoflan Cake) for a baby shower! I got work!

So... I had to share with everyone about it... Thanks for reading!

Here I am with my new friends


If you'd like to do your own "Mexican Feast" You can use my recipes... (from my Mexican cooking blog and here, from The Coffee Shop, too) here they are:

Cochinita Pibil
Pollo con Rajas Poblanas
Chocoflan Cake

© Paloma King

Monday, May 7, 2012

Chicken Parmigiana

Well... today I made a delicious and better than restaurant "Chicken Parmigiana" I slightly adapted the recipe from Martha Stewart's website, "Everyday-Food". The original recipe is by Everyday-Food Editor Sarah Carey and I loved its simplicity! Plus it had great reviews so I decided to make it too!

Here is the recipe: (slightly adapted)

Homemade Chicken Parmigiana

Ingredients
  • 3/4 cup plain breadcrumbs
  • 3/4 cup grated Parmesan cheese
  • 8 chicken cutlets (about 1 1/2 pounds total), or 4 boneless, skinless chicken breasts, halved horizontally
  • Coarse Salt (I use Kosher) and freshly ground pepper
  • 1 large egg, lightly beaten
  • 2 cups jarred tomato sauce (Spaghetti Sauce, I use the one that is just "basil/tomato" sauce or you can make your own.
  • 1/4 cup olive oil
  • 6 ounces mozzarella cheese, preferably fresh, cut into eight 1/4-inch-thick slices. (you can use shredded mozzarella, which is what I used)
Directions
  1. Pre-heat your oven at 400F. Combine breadcrumbs and Parmesan in a shallow bowl. Season both sides of chicken with 1/2 teaspoon salt and 1/4 teaspoon pepper. Dip chicken in the beaten egg, then dredge in breadcrumb mixture, turning to coat both sides.
  2. Spread tomato sauce onto the bottom of a 10-by-15-inch baking dish. Heat 2 tablespoons oil in a large nonstick skillet over medium heat. Place 4 chicken cutlets in skillet; cook until golden, 1 to 2 minutes on each side. Using a spatula, transfer browned cutlets to baking dish, placing them on top of sauce. Repeat with remaining oil and cutlets.
  3. Bake for 18 minutes. Increase oven temperature @475F, remove baking dish from oven and add your mozzarella cheese to each chicken breast. Return to the oven (cheese should melt and lightly brown in spots), 5 to 8 minutes. Serve immediately with a side of pasta or your favorite salad (I use the Baby Spring Mix and Italian Dressing)


    Enjoy!
Paloma K.

Friday, May 4, 2012

Thinking Chinese Take out? Think again!

I just love Chinese food! (at least the American version of it!) I have never been in China to know for sure what real Chinese food is... and being a Mexican in the USA I know for a fact that what people know as "Mexican food" is very (VERY) far from "The Real Thing" (yup, there are things people in the USA think they are "Staples" of Mexican Cuisine and in Mexico we have never even heard of!) but anyway... we are talking "Chinese" right? I was saying... I love Chinese food! But I know that even when it might look "healthy" just because it is lots of rice and vegetables, well... Chinese take-out is not the healthiest (or leanest) option for dinner. Lots of sugar, then the battered (oh! so deliciously battered) chicken and oil (plus all the calories in the white rice) can make you consume at least 800 calories "all at once" (I know! Who am I to "criticize" the amount of calories when I am always posting about decadent desserts!?) but anyway... Last night I found a "lighter" (not light! not the healthiest) but "lighter" version of a famous "Chinese take-out" dish... "General Tso's Chicken"... I wasn't going to eat it anyway (it still has sugar in it! and I am really watching what I eat!)  but I thought hubby would love it (and he did!) and he would also love the fact that it is WAY CHEAPER than the "real deal"... so ... here is the recipe.
 
 
Lighter General Tso's Chicken
Slightly adapted from Martha Stewart's recipe.

Ingredients

  • 1 cup long-grain brown rice
  • 1/4 cup cornstarch
  • 1 pound snow peas, trimmed and halved crosswise
  • 4 garlic cloves, sliced (or 1 tsp. of garlic powder)
  • 2 teaspoons fresh ginger, grated and peeled
  • 3 tablespoons light-brown sugar
  • 2 tablespoons soy sauce
  • 1/2 teaspoon red-pepper flakes
  • 2 large egg whites
  • Coarse salt and ground pepper
  • 1 1/2 pound boneless, skinless chicken breasts, cut into 1-inch pieces (about 2 chicken breasts)
  • 2 tablespoons vegetable oil, such as safflower

Directions

  1. Cook rice according to package instructions (if the package doesn't call for salt just add 1 tsp.). Meanwhile, in a large bowl, stir together 1 tablespoon cornstarch and 1/2 cup cold water until smooth. Add snow peas, garlic, ginger, sugar, soy sauce, and red-pepper flakes; toss to combine, and set aside.
  2. In another bowl, whisk together egg whites, remaining 3 tablespoons cornstarch, 1/2 teaspoon salt, and 1/4 teaspoon pepper. Add chicken, and toss to coat.
  3. In a large nonstick skillet, heat 1 tablespoon oil over medium-high. Lift half the chicken from egg-white mixture (shaking off excess), and add to skillet. Cook, turning occasionally, until golden, 6 to 8 minutes. Transfer to a plate; repeat with remaining oil and chicken, and set aside (reserve skillet).
  4. Add snow-pea mixture to skillet. Cover; cook until snow peas are tender and sauce has thickened, 3 to 5 minutes. Return chicken to skillet (with any juices); toss to coat. Serve with rice.


Enjoy!


Paloma K.

Thursday, May 3, 2012

A "lick the bowl good" dessert


Hello everybody! I just wanted to stop by and share an amazing and impressive looking recipe I found yesterday when looking for something to make with the fresh strawberries I had... I felt like doing something "different and unique" with them so I did. I was surprised (and happy) to see how EASY to make this dessert is... it looks complicated and fancy but it is something a mom (like me) with a 3 yr. old and a 1 yr. old can make in between laundry loads, baby feeding, etc! So... I will let the cake speak for itself now:


Strawberry Chantilly
Slightly adapted from Lick The Bowl Good

For the Crust:
  • 1 cup all purpose flour
  • ¼ cup brown sugar
  • ½ cup cold unsalted butter
  • ½ cup crushed "Marias" or "Graham" crackers (you should try the original recipe, it calls for pecans or almonds, I just had none)
For the Filling:
  • 2 egg whites
  • 1 cup granulated sugar
  • 2 cups fresh strawberries
  • 1 cup heavy whipping cream
  • 1 teaspoon lime (or lemon) juice
  • 2 drops red food coloring, optional - I didn't use any -
For the crust: Cut the cold butter into the flour and sugar until crumbly, then stir in the chopped pecans. Press mixture into the bottom and halfway -a little less- up the sides of a springform pan and bake at 325 for 22 minutes (until it looks golden brown) -you could also use a 9x13-inch baking dish and bake at 300 for 20 minutes but I guess you'd have to serve it directly from the dish. I put mine in the refrigerator to cool faster while I made the filling. 

For the Filling: Pulse the strawberries in a food processor until is mostly pureed but still a little lumpy. Place the pureed strawberries, egg whites, sugar and lime juice in a bowl of your electric stand mixer. Beat on high for ten minutes. Add food coloring, if using, and mix for a few more seconds till the color is fully incorporated.
In a different bowl, beat the heavy whipping cream until you get stiff peaks. Gently fold, by hand, the whipped cream into the strawberry meringue mixture.
Pour the filling into the baked and cooled crust and cover well. Freeze for at least 6 hours, preferably overnight.
Slice and serve frozen chantilly with additional strawberries (or chocolate covered strawberries), if desired.


Hubby just LOVED this dessert! He said he had nothing like this before! And he was "shocked" when he saw it ... so you also get that "fall in love at first sight" factor on your side! Trust me... it is delicious... and all you do is put it all in the electric mixer, then in the pan and freeze! It is sooo good! Let me know if you try it.


Paloma K.

Wednesday, May 2, 2012

Pulled-Pork Sandwiches with Coleslaw

This recipe is one of those "Martha Stewart" recipes that I HAD TO try! I remember I thought about making pulled pork right before my then almost 2 yr. old was going to have her tonsils removed and I wanted to have something in the freezer that would be "quick" to put together for hubby's lunch/dinner and for myself too when I had no chance to cook because I would be taking care of my baby in the hospital and then at home... So... I remembered I had bought Pork Shoulder in the store and I still wasn't sure what to do with it... I knew I wanted "Pulled Pork" but I had never made it before and I had had my share of bad experiences with Pork Shoulder... anyway... I found this recipe and I thought it sounded really good so I gave it a try! I am glad I did because once the pork was ready I just divided it in smaller portions and froze them and used them up whenever I needed. Hubby loved these sandwiches and that's what I do with pork shoulder now and when I know I'll have visits from out of town for over 2 days and we'll probably be on the go and without much time for me to cook. Recipe:


Easy Pork Shoulder
From Martha Stewart

Ingredients

  • 1 boneless pork shoulder (7 pounds)
  • Coarse salt and ground pepper
  • 1/2 cup water

Directions

  1. Preheat oven to 450 degrees. Using a sharp knife, score the fat (but not the meat) on 1 boneless pork shoulder (7 pounds) in a diamond pattern. Season with coarse salt and ground pepper. Place pork, fat side up, in a roasting pan or large Dutch oven with 1/2 cup water. Roast until some fat has rendered, about 45 minutes. Remove pan from oven and reduce oven temperature to 350 degrees. Tightly cover pan with foil or a lid. Cook until meat is very tender, about 4 hours. When cool enough to handle, remove fat from top of roast. Using two forks, shred meat into bite-size pieces, discarding any large pieces of fat.

How to store: Refrigerate shredded meat in airtight containers, up to 3 days, or freeze in 2- or 3-cup portions, up to 3 months. If desired, reserve fat and render by cooking over low heat until mostly liquid. Strain and refrigerate; use in place of oil. (you can also make tacos with this pork recipe, just add it to corn tortillas, pico de gallo or salsa and avocado!... YUM!)

Let's make those sandwiches with coleslaw

Ingredients

  • 2 cups shredded green cabbage (from 1/2 small head)
  • 1 carrot, cut into strips using a vegetable peeler
  • 1 tablespoon cider vinegar
  • 1 tablespoon extra-virgin olive oil
  • Coarse salt and ground pepper
  • 3/4 cup homemade or store-bought barbecue sauce
  • 2 cups Easy Pork Shoulder (recipe above)
  • 4 hamburger buns

Directions

  1. In a bowl, combine cabbage, carrot, vinegar, and oil; season with salt and pepper. Let coleslaw stand 5 minutes. In a small saucepan, combine barbecue sauce and pork. Cook over medium-high until warmed through, about 5 minutes. Serve pork on buns with coleslaw.
Thanks for another great recipe Martha!
 
 © Paloma K